# How to Subscribe and Access to API
# API Store Front
You have to subscribe to a published API before using it in your applications. Subscription to an API enables you to receive access tokens and be authenticated to invoke the API.
OIP Service Exchange Platform (SEP) provides various options of APIs which include the following categories:
- Internet of Things
- Communication
- Big Data & AI
- Notification
- Open Data
- Location
- Telco's Data
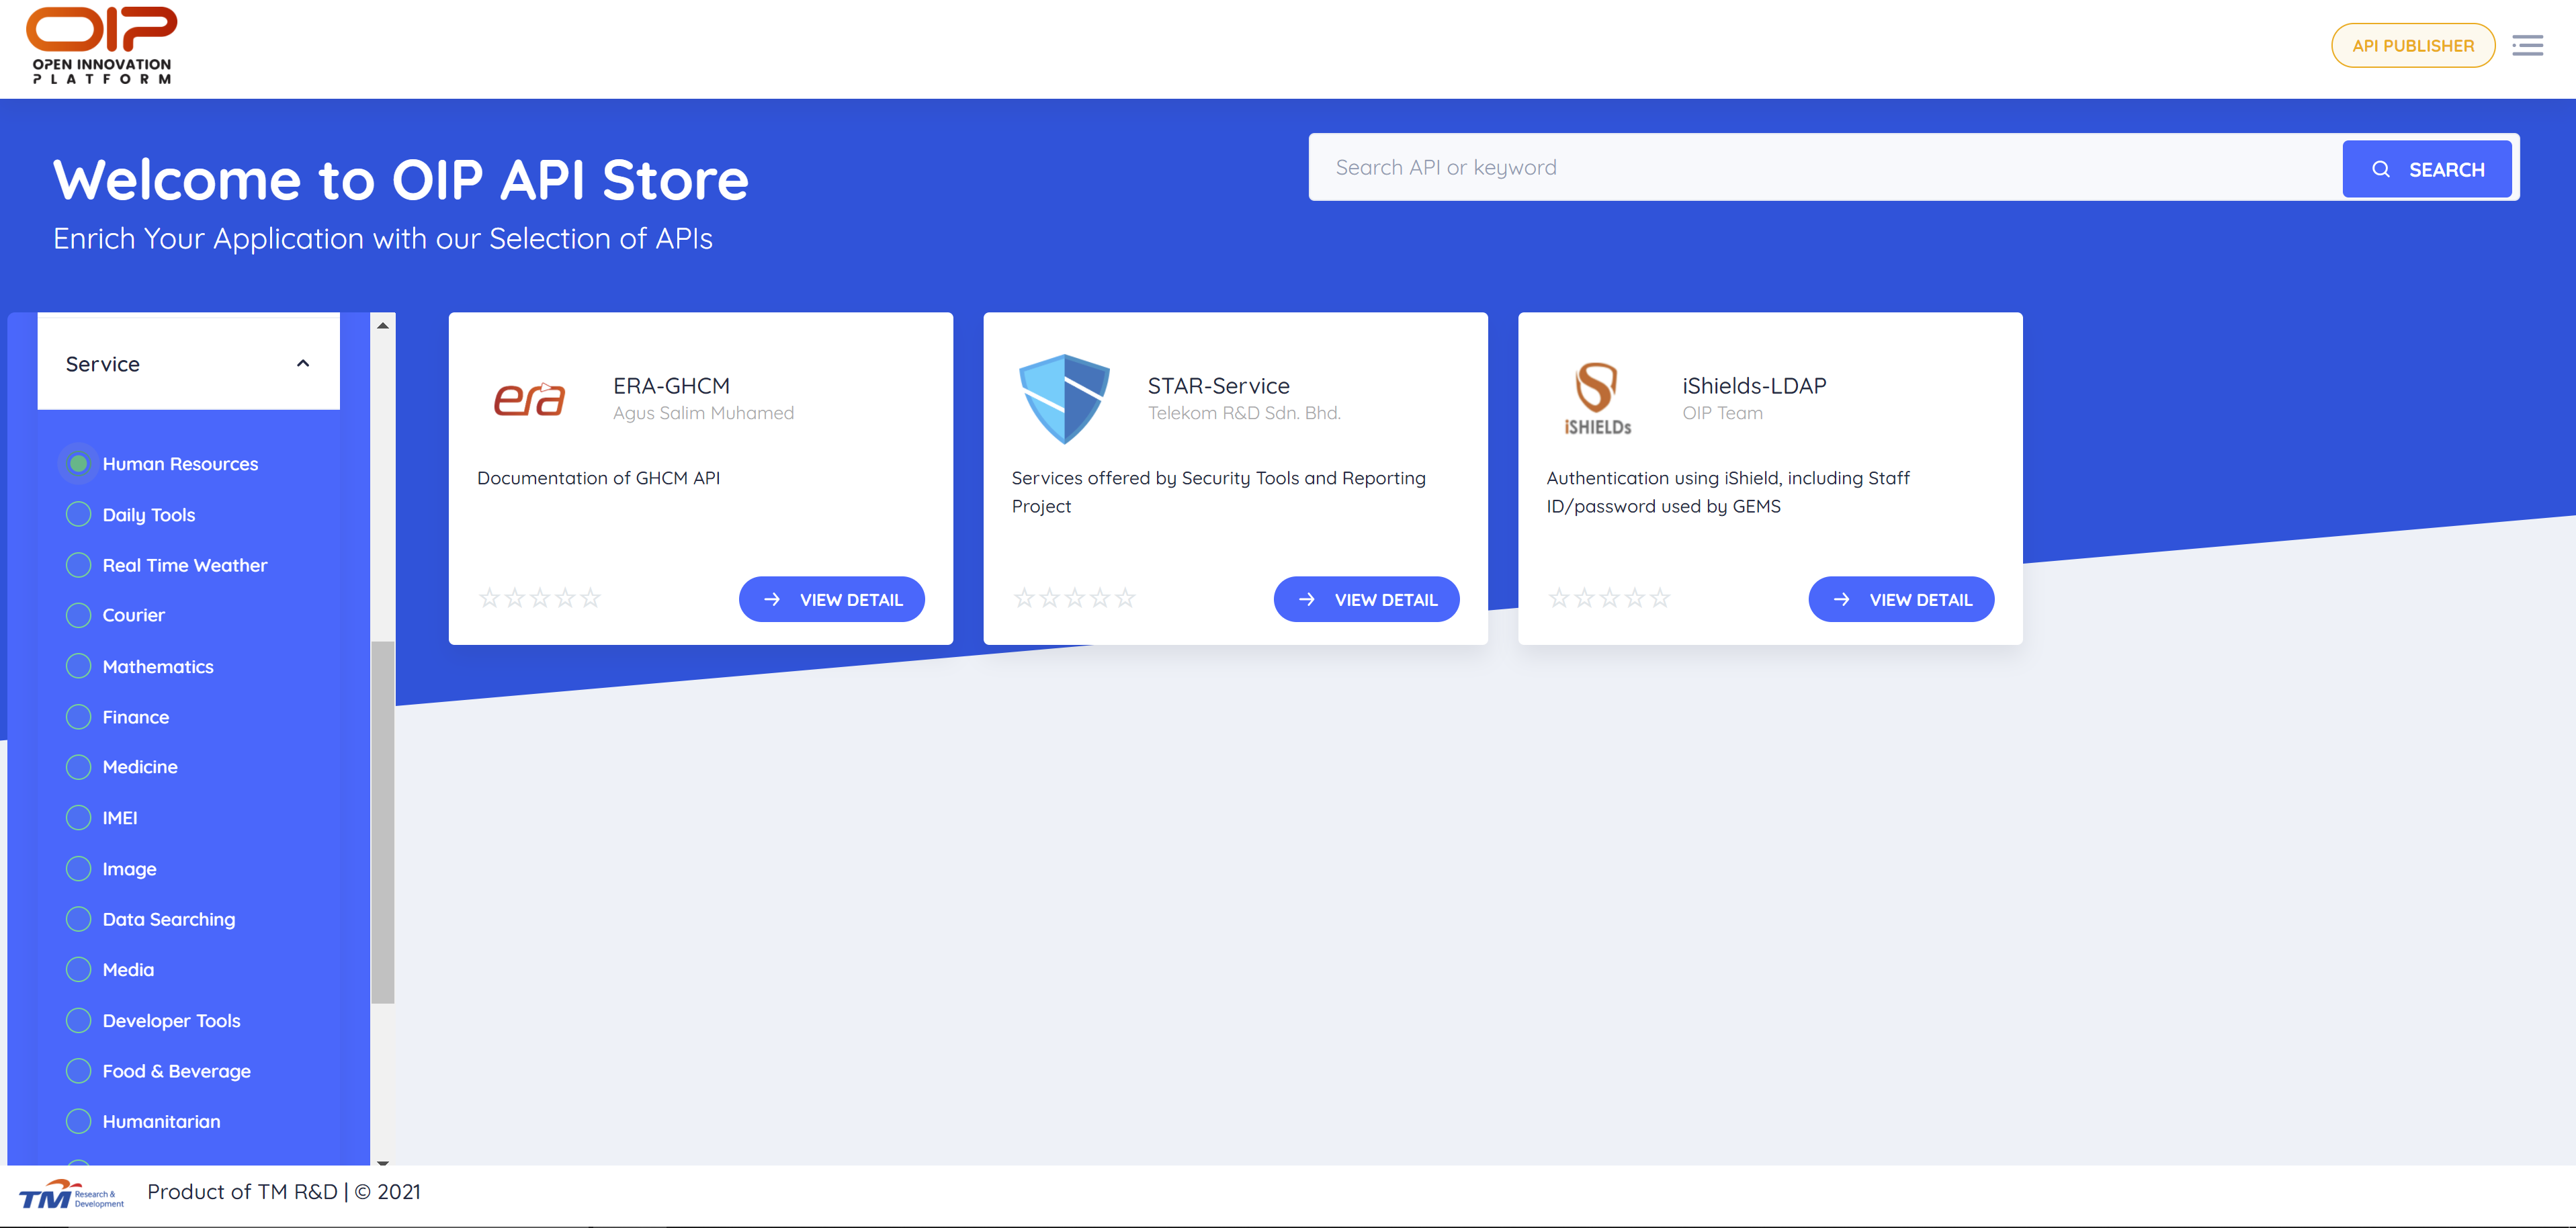
- Service
You can browse through the API store and view the API available here
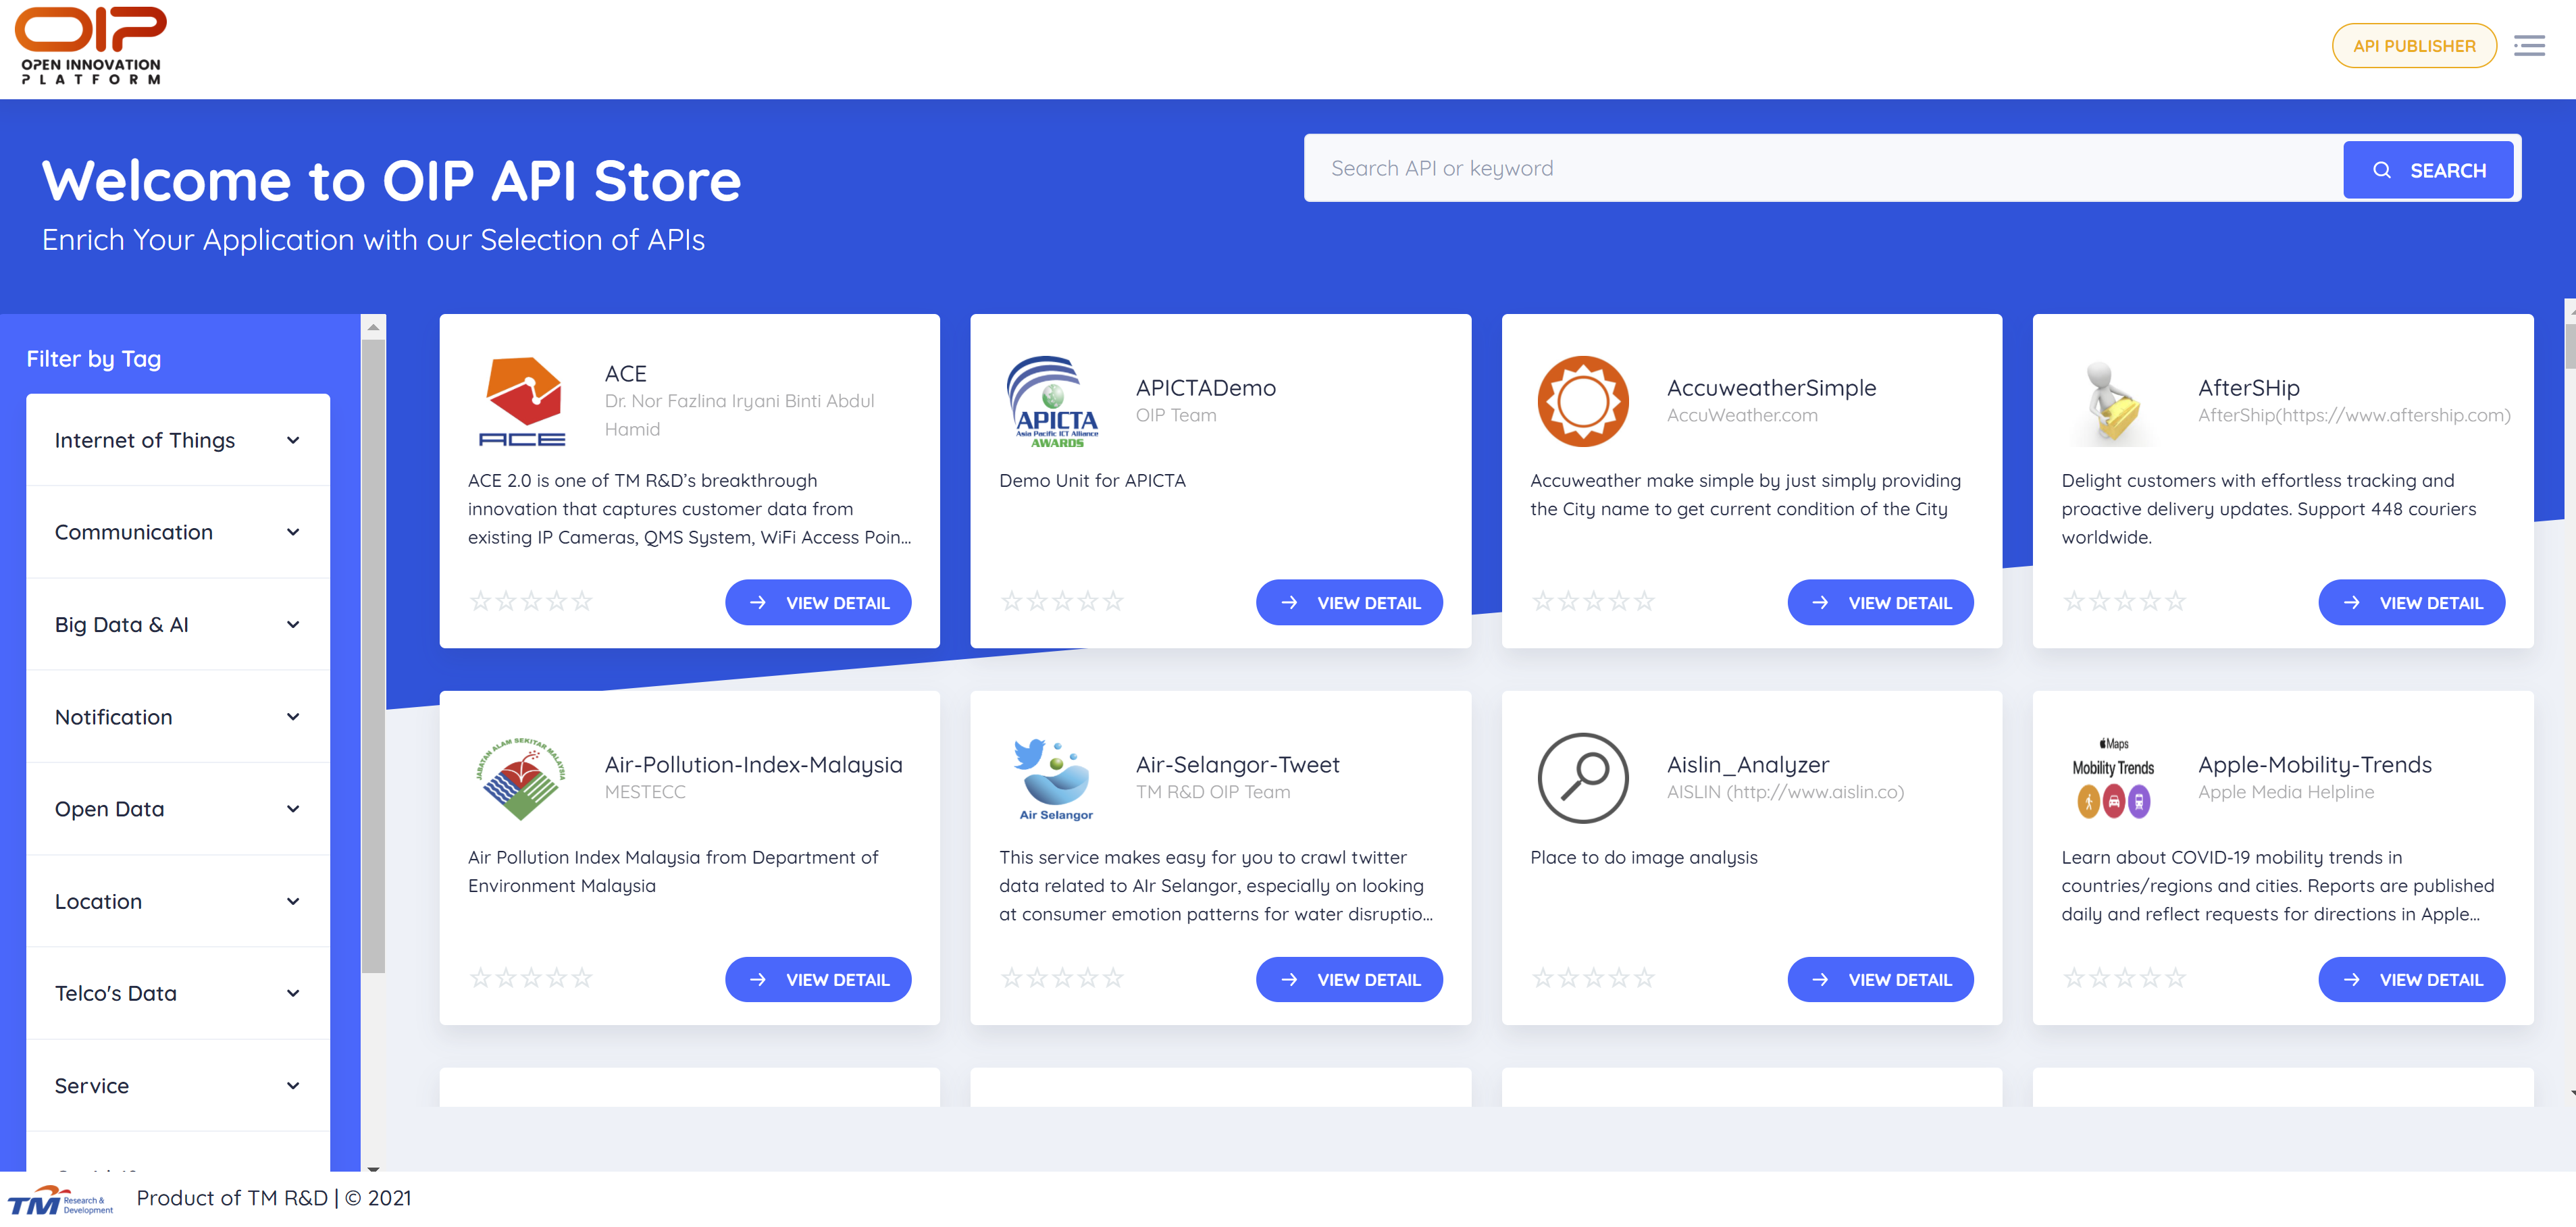
The APIs have been grouped into several categories which you can use for filtering and narrowing your search. For example, SERVICE category contains miscellaneous API services that you can use to replace your human task with programmable web solution.
# Subscribing to an API
# Subscribing to a Free API
Let us demonstrate on how to subscribe to AccuweatherSimple API in Service Hub. The way to use other Free API will be similar as described here.
Find AccuweatherSimple API in the store front. You can also use the search bar search for the API. Click at View Detail at AccuweatherSimple API and you can see the API is tagged as Free.

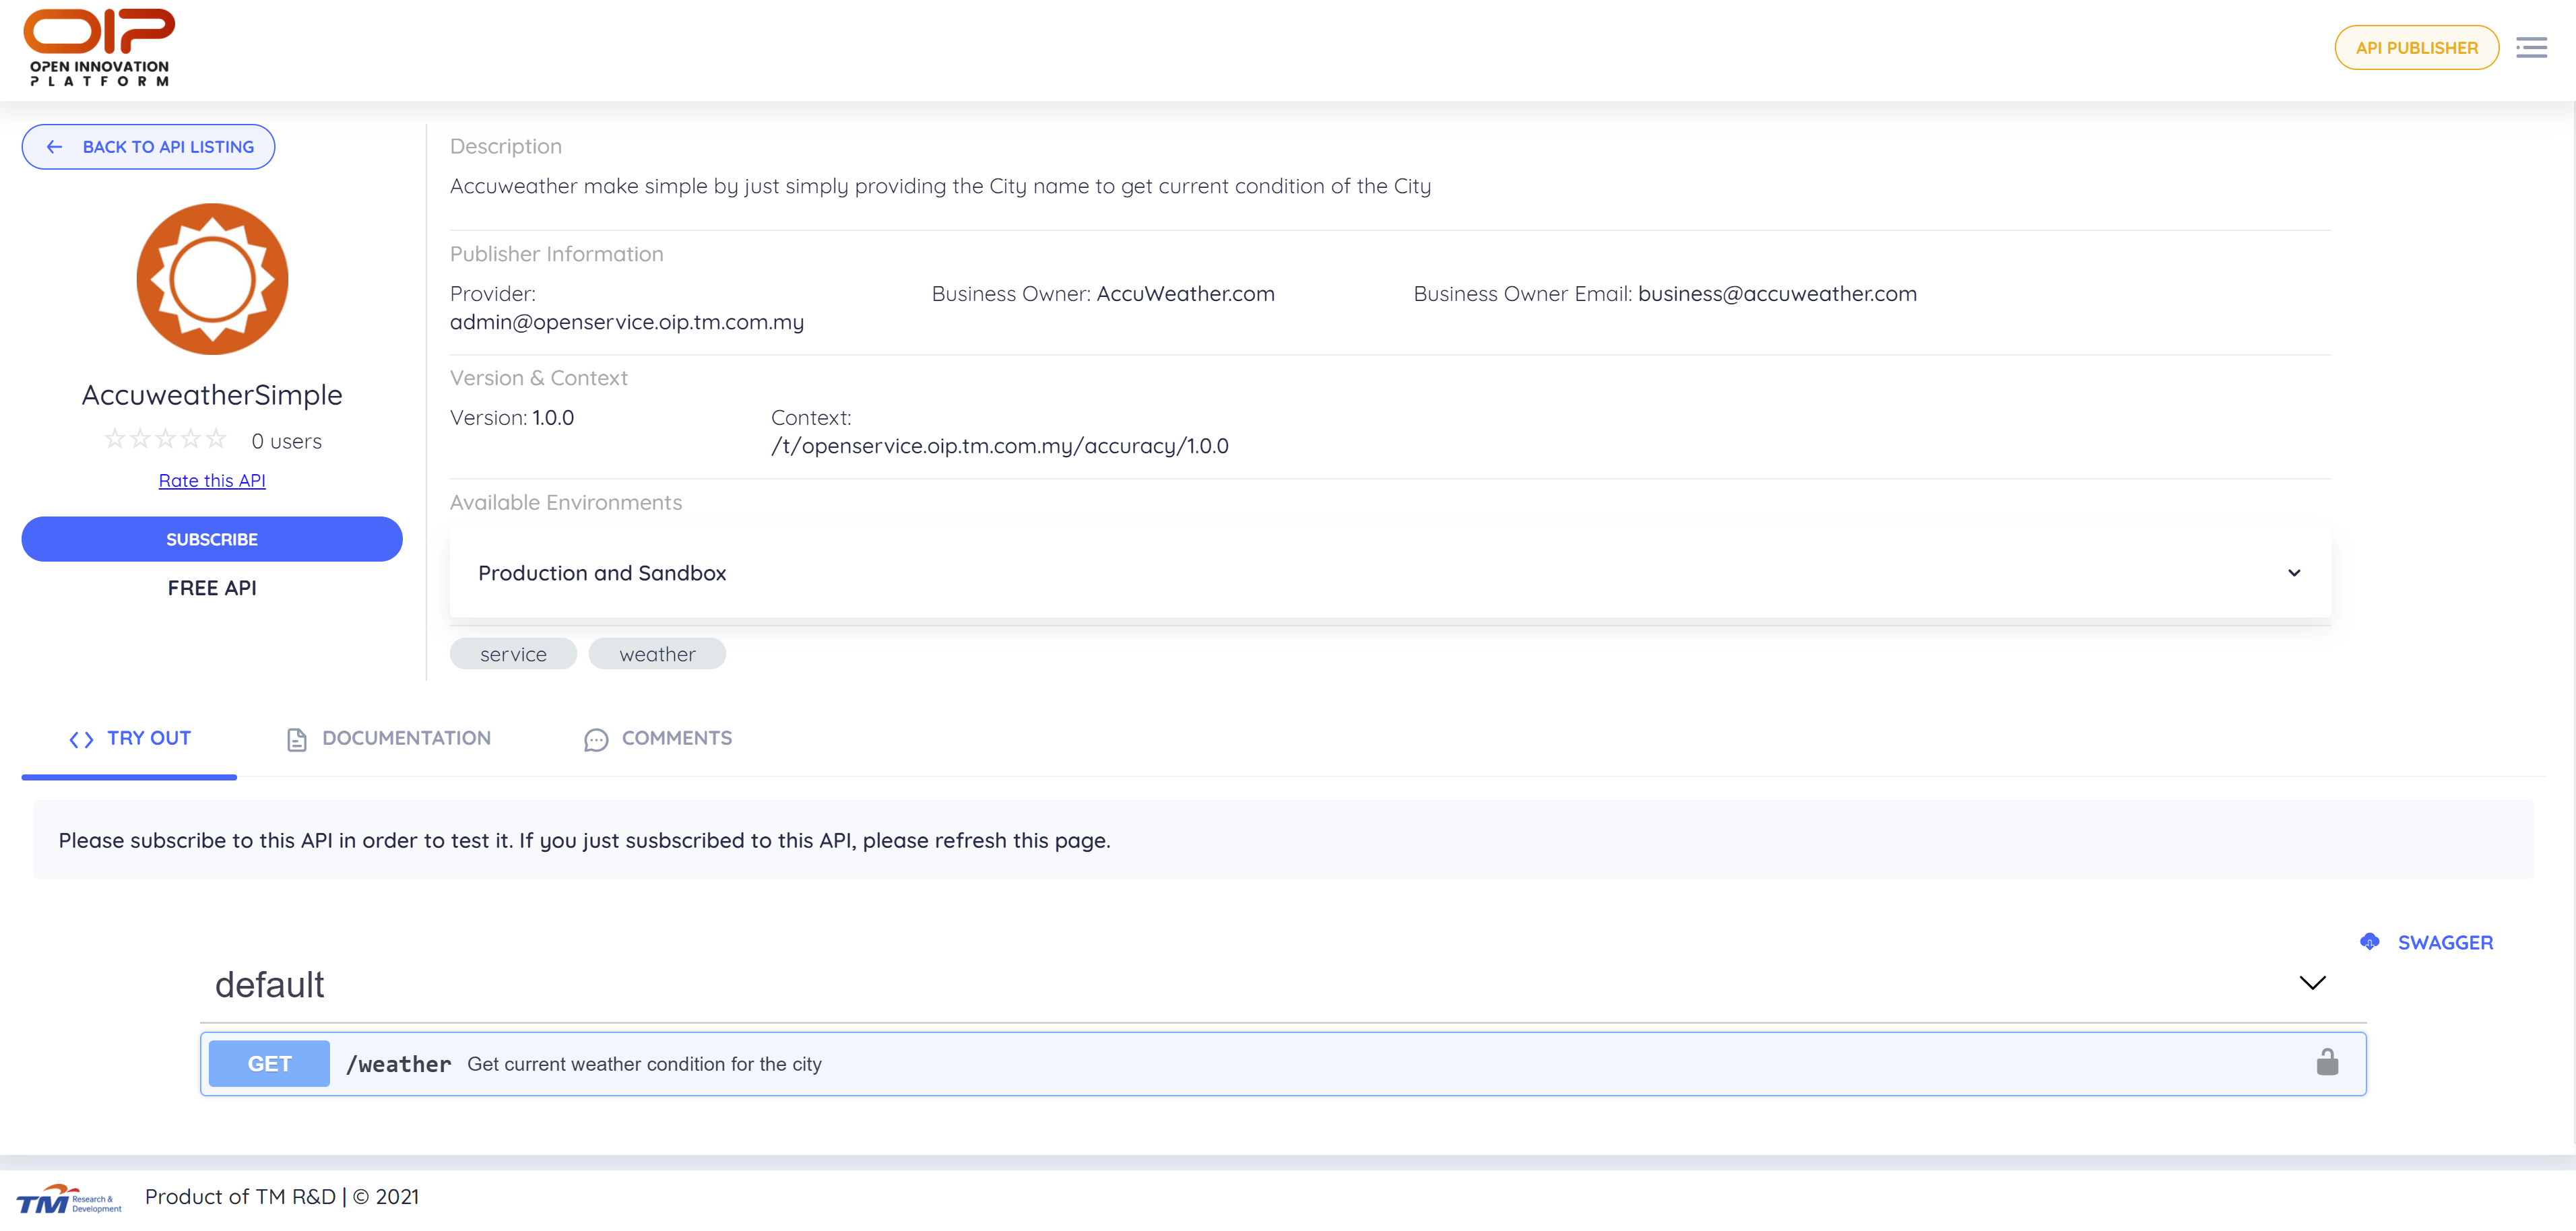
Click Subscribe button to proceed.
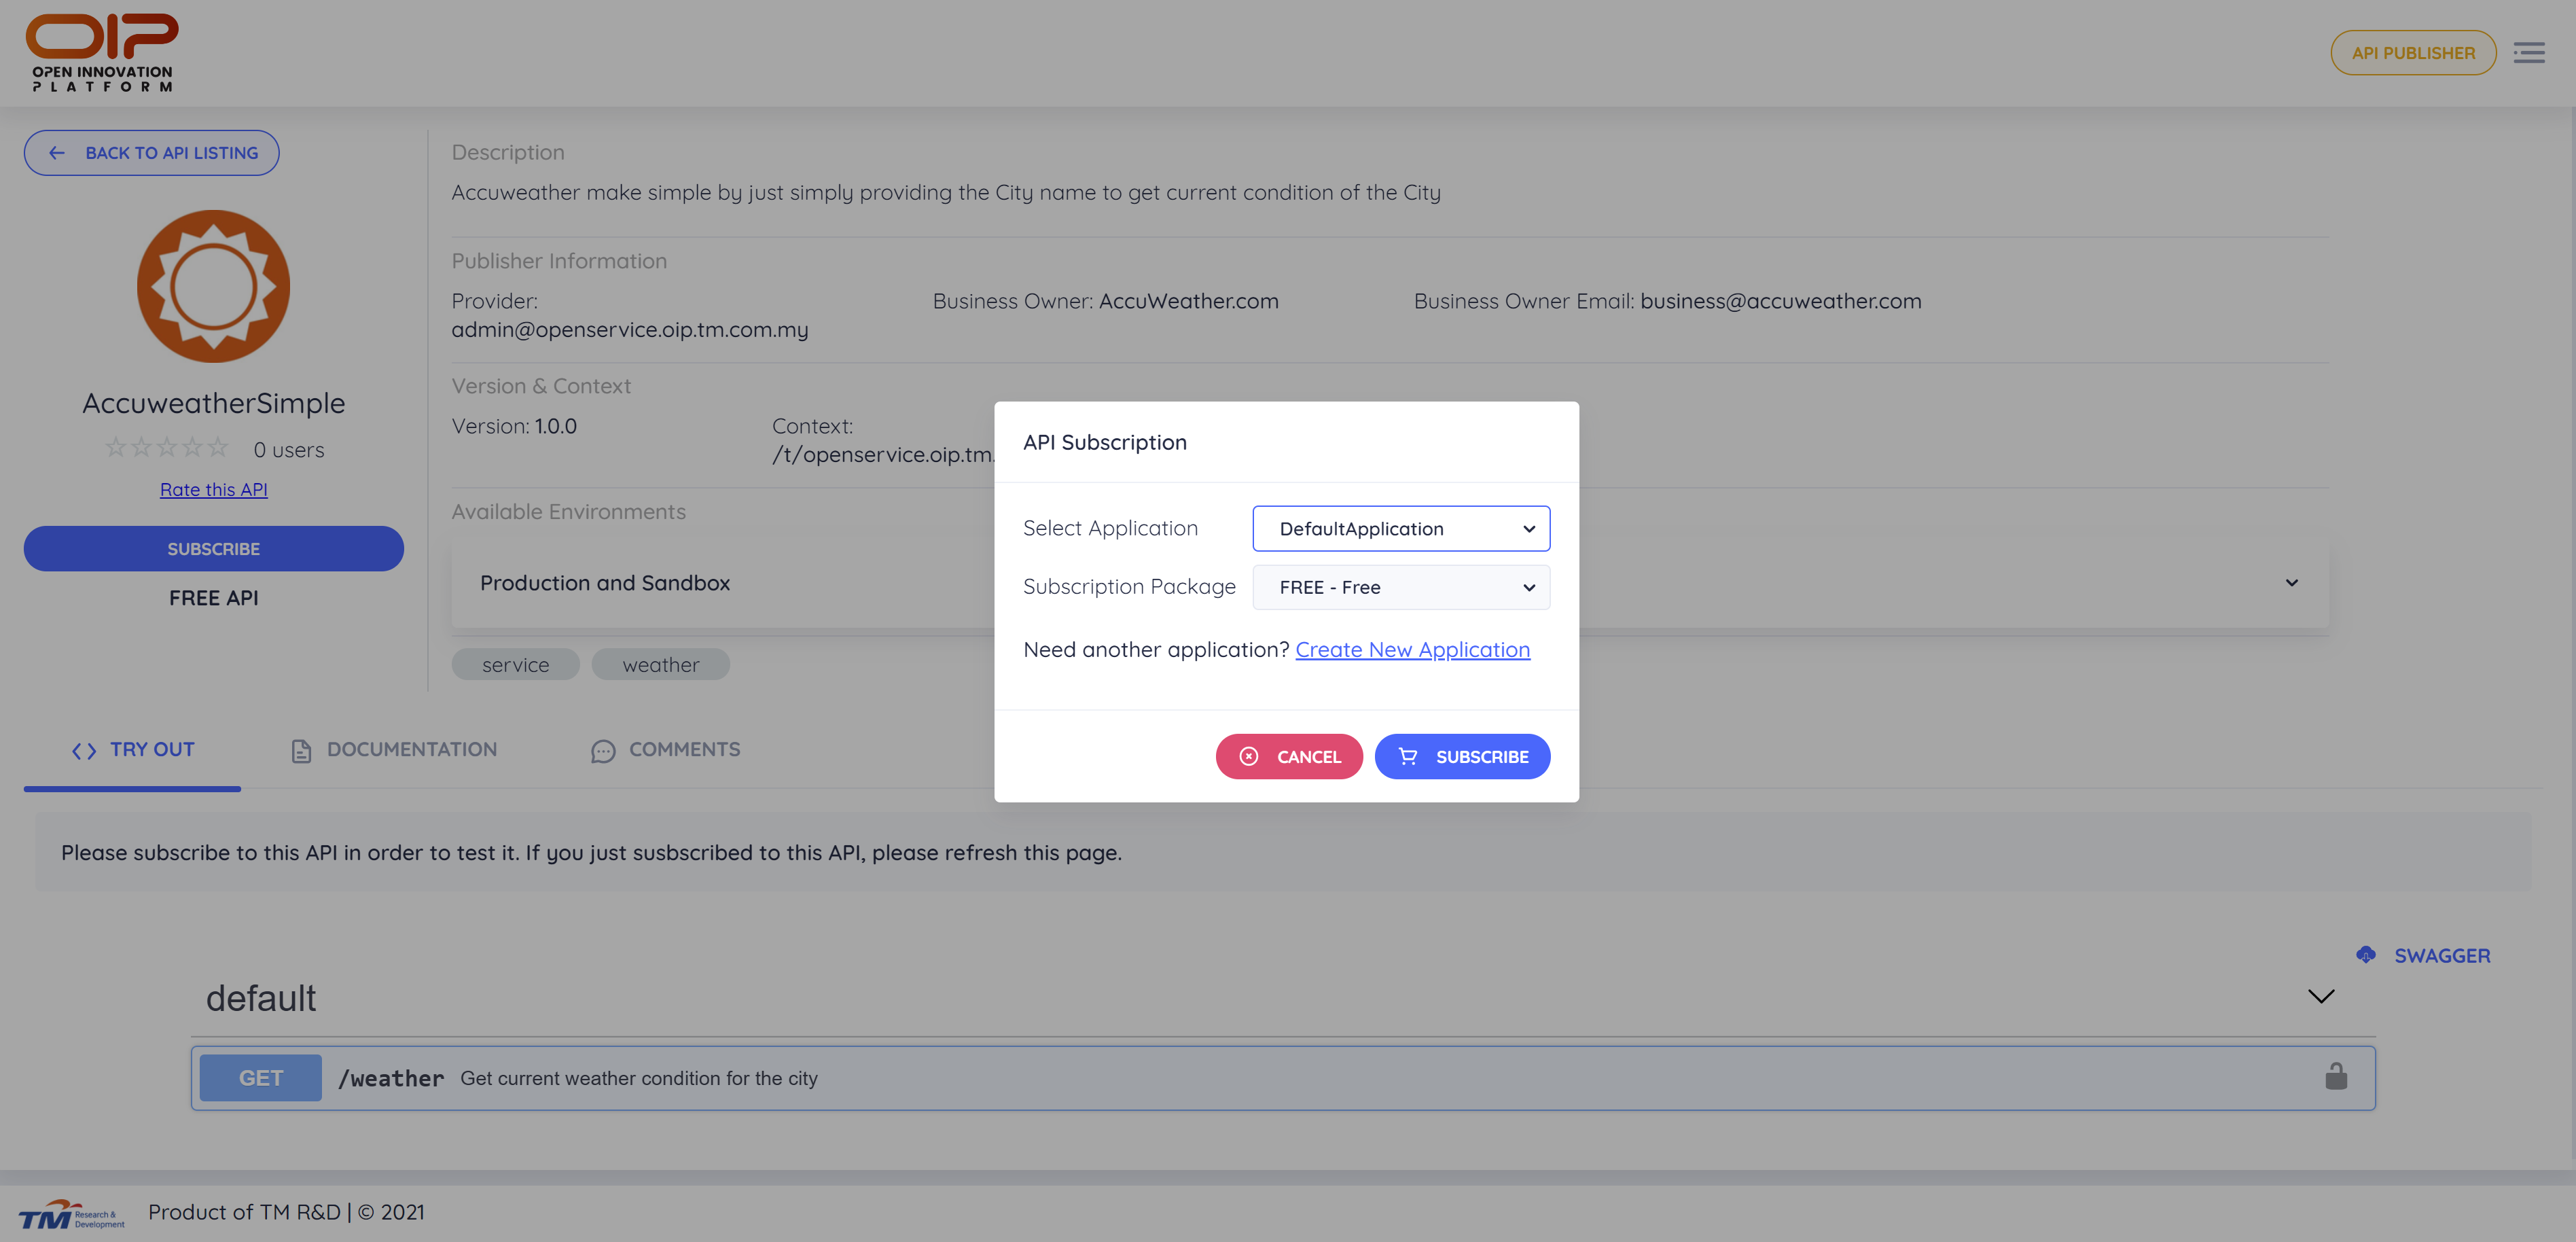
You can use the DefaultApplication. But if you would like to group your services under another application, you need to create a new application which will be shown next.
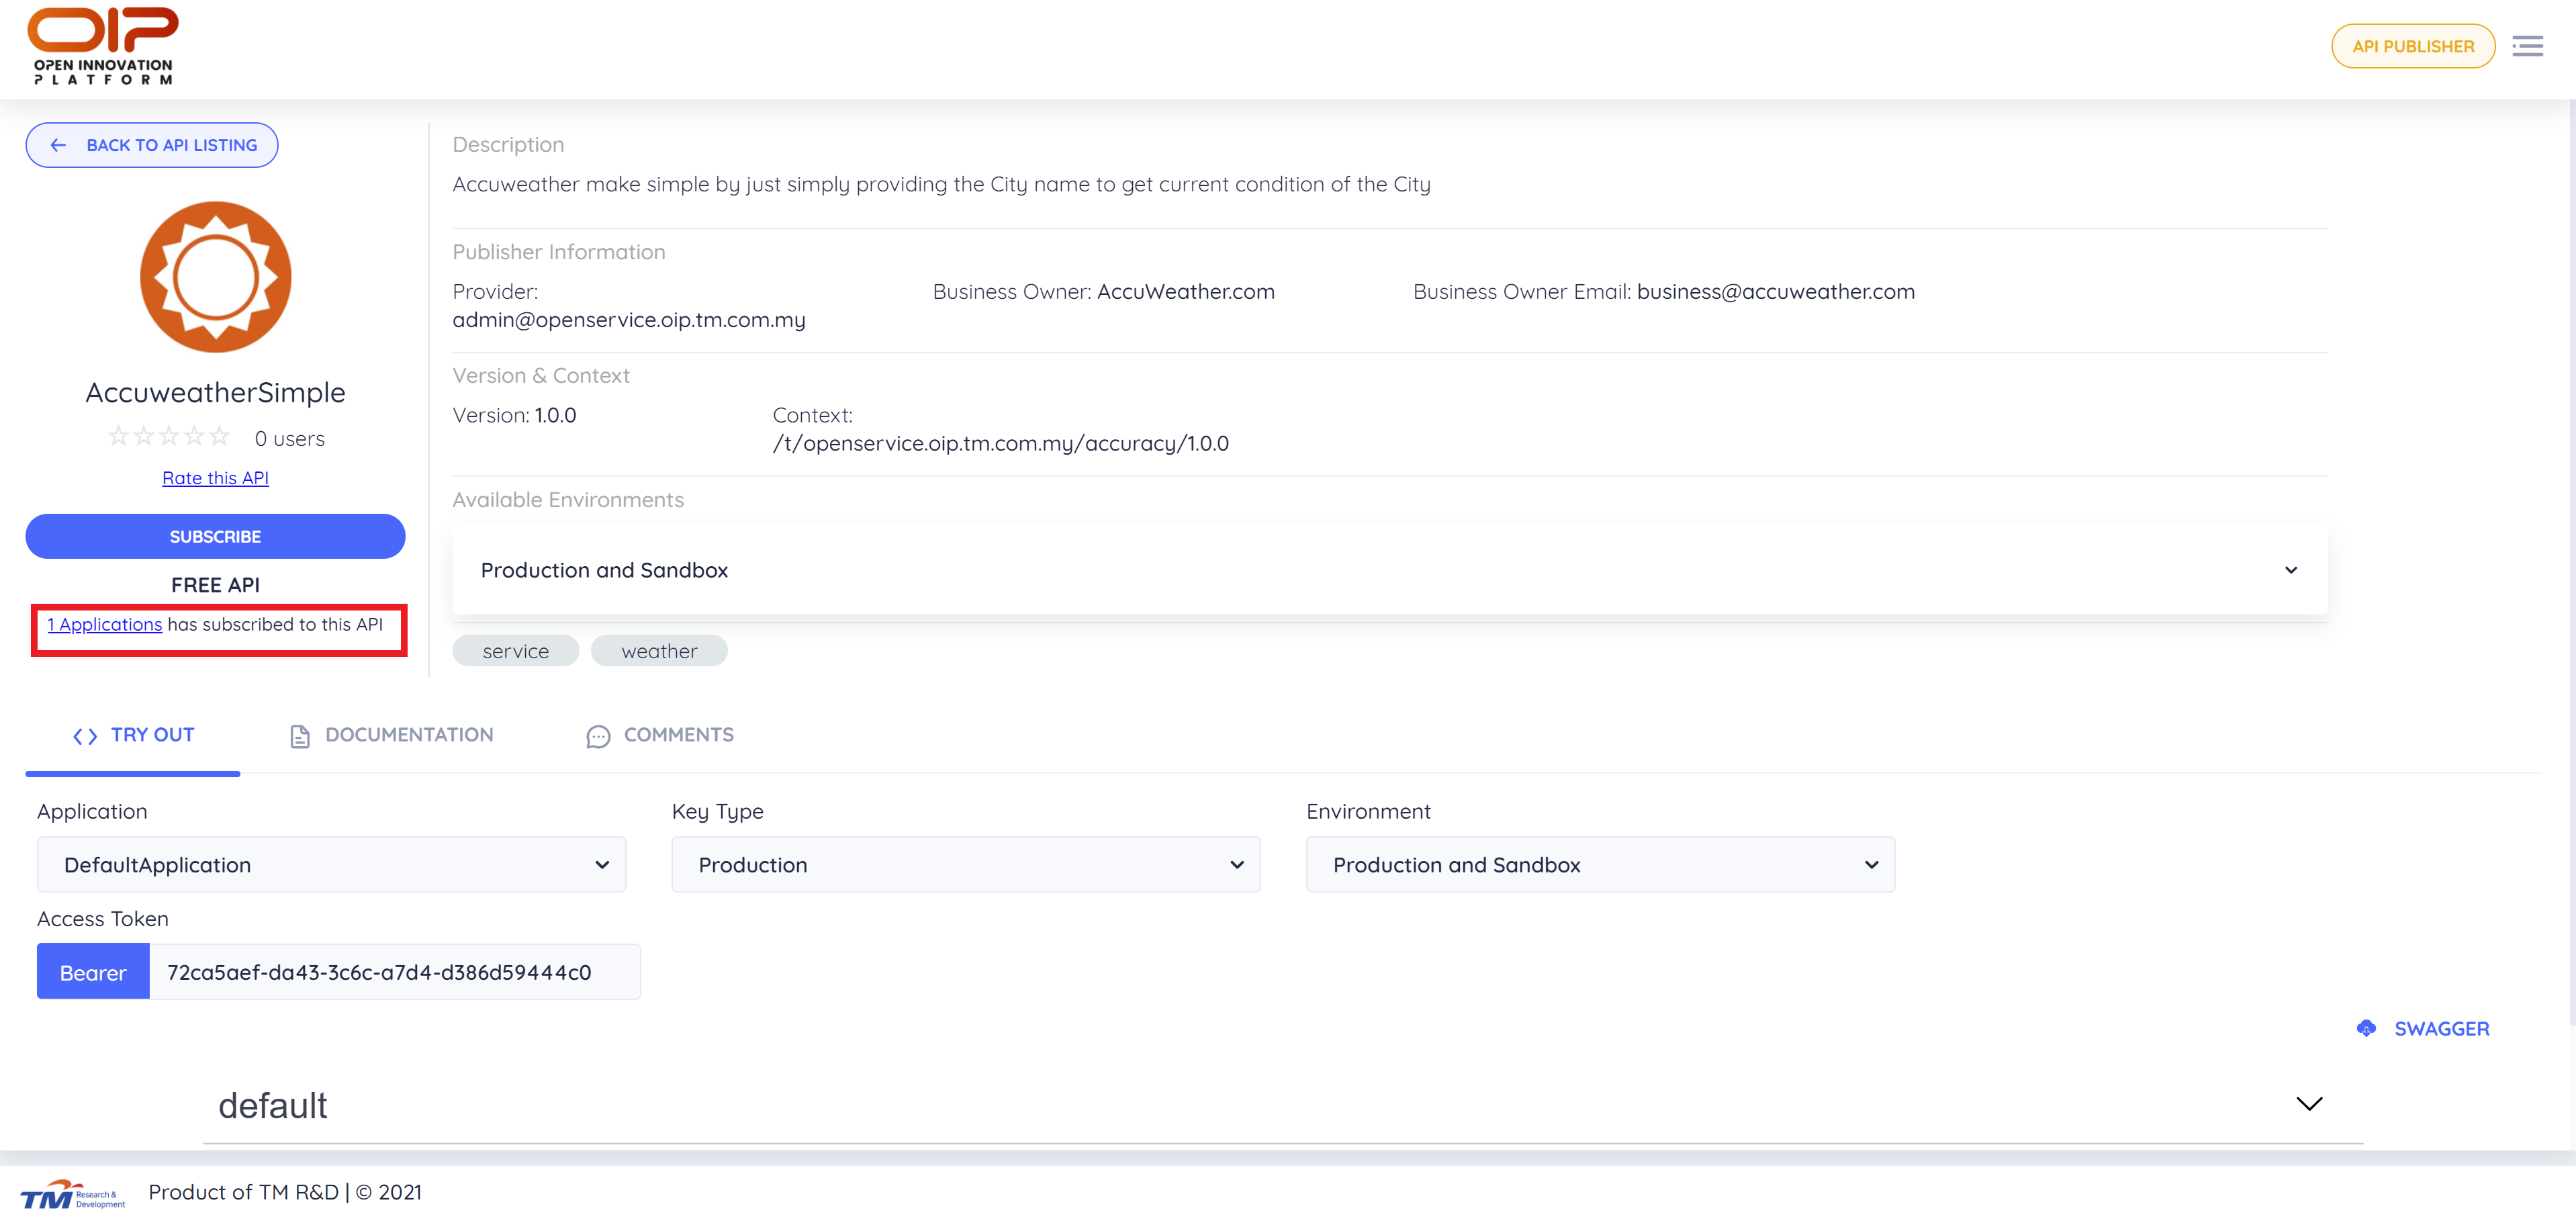
Once you have successfully subscribed to the API, a successful subscription message will pop up.
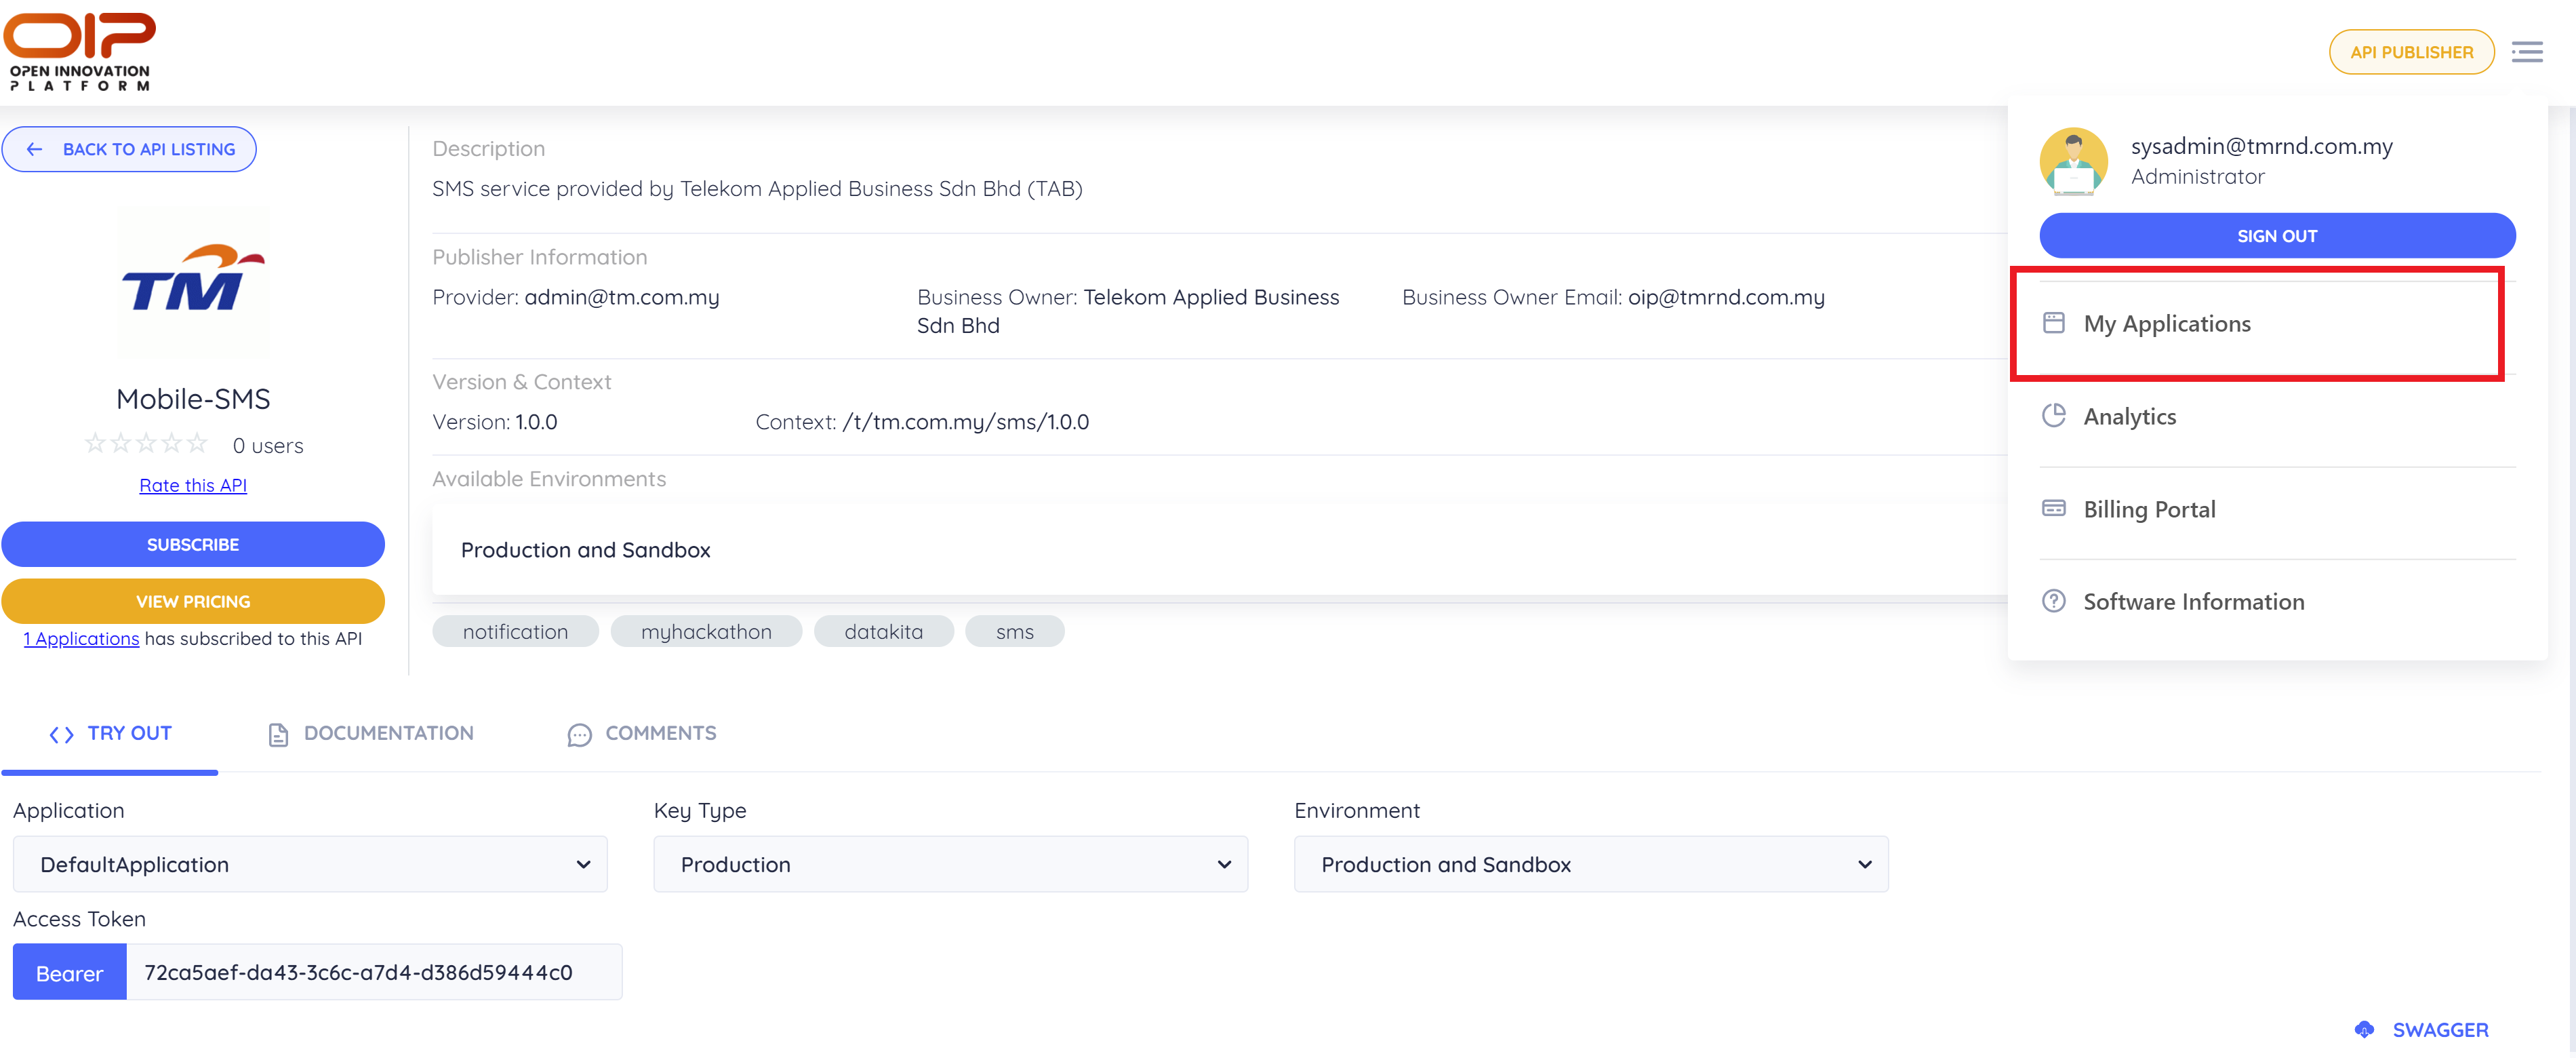
You can verify your subscription by viewing Application Detail. Click on the link below the API Pricing and select the Application that you use to subscribe to the API.

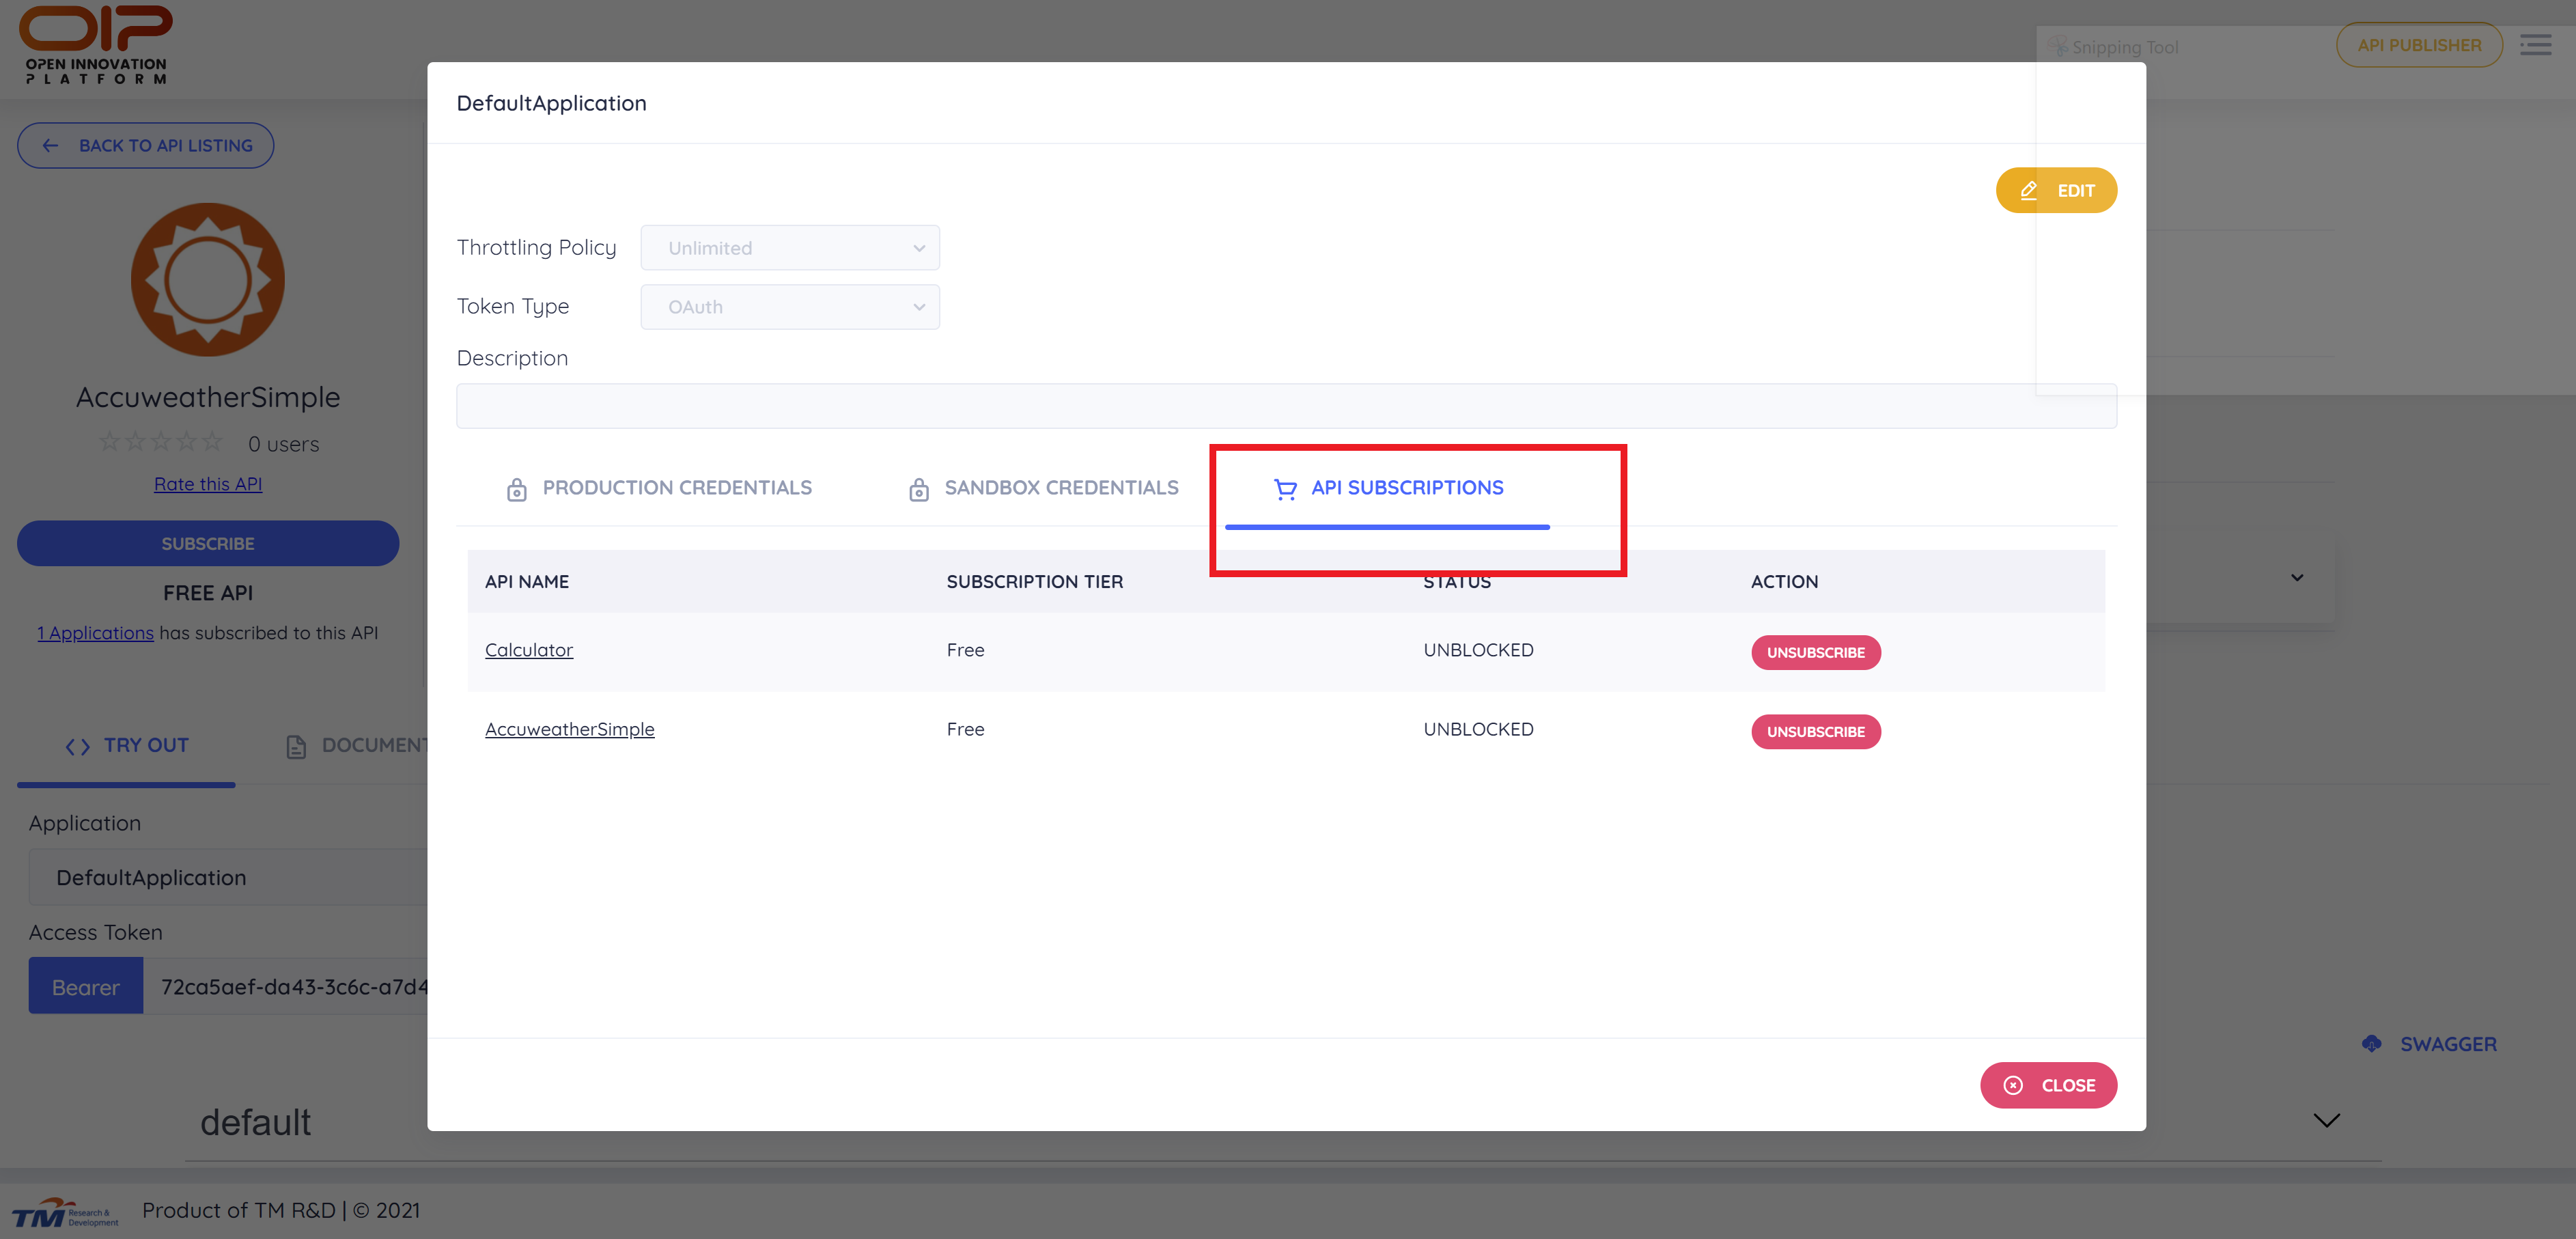
Click on API Subscriptions tab, you will see the status all API subscriptions under that application.
# Subscribing to a Paid API
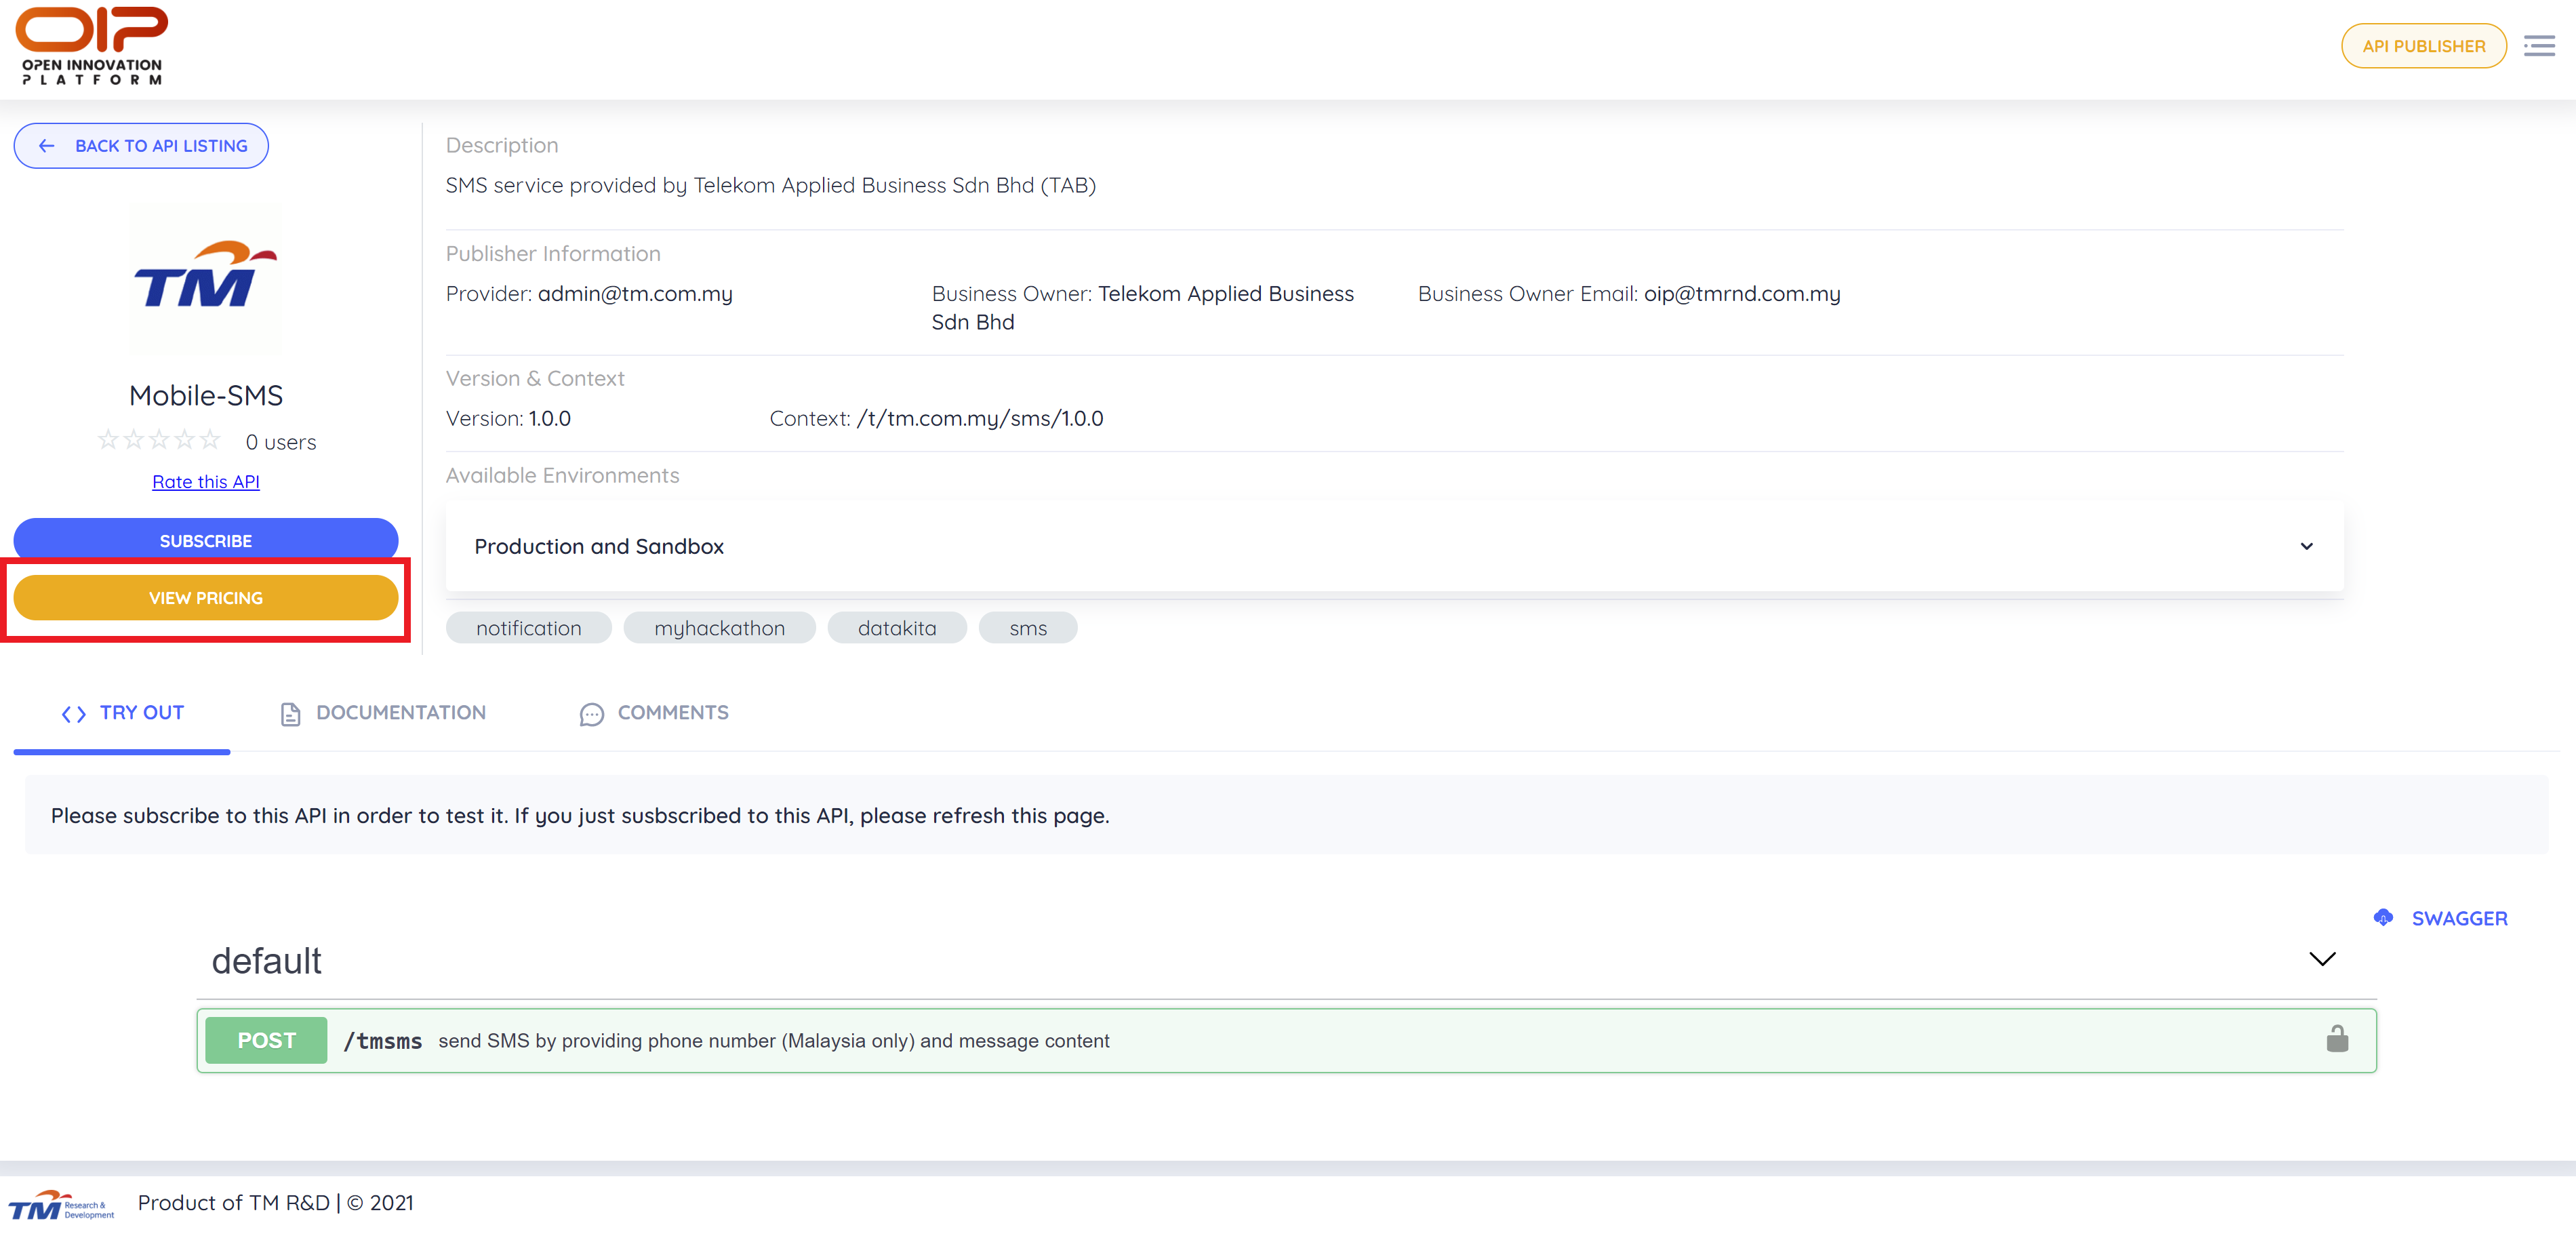
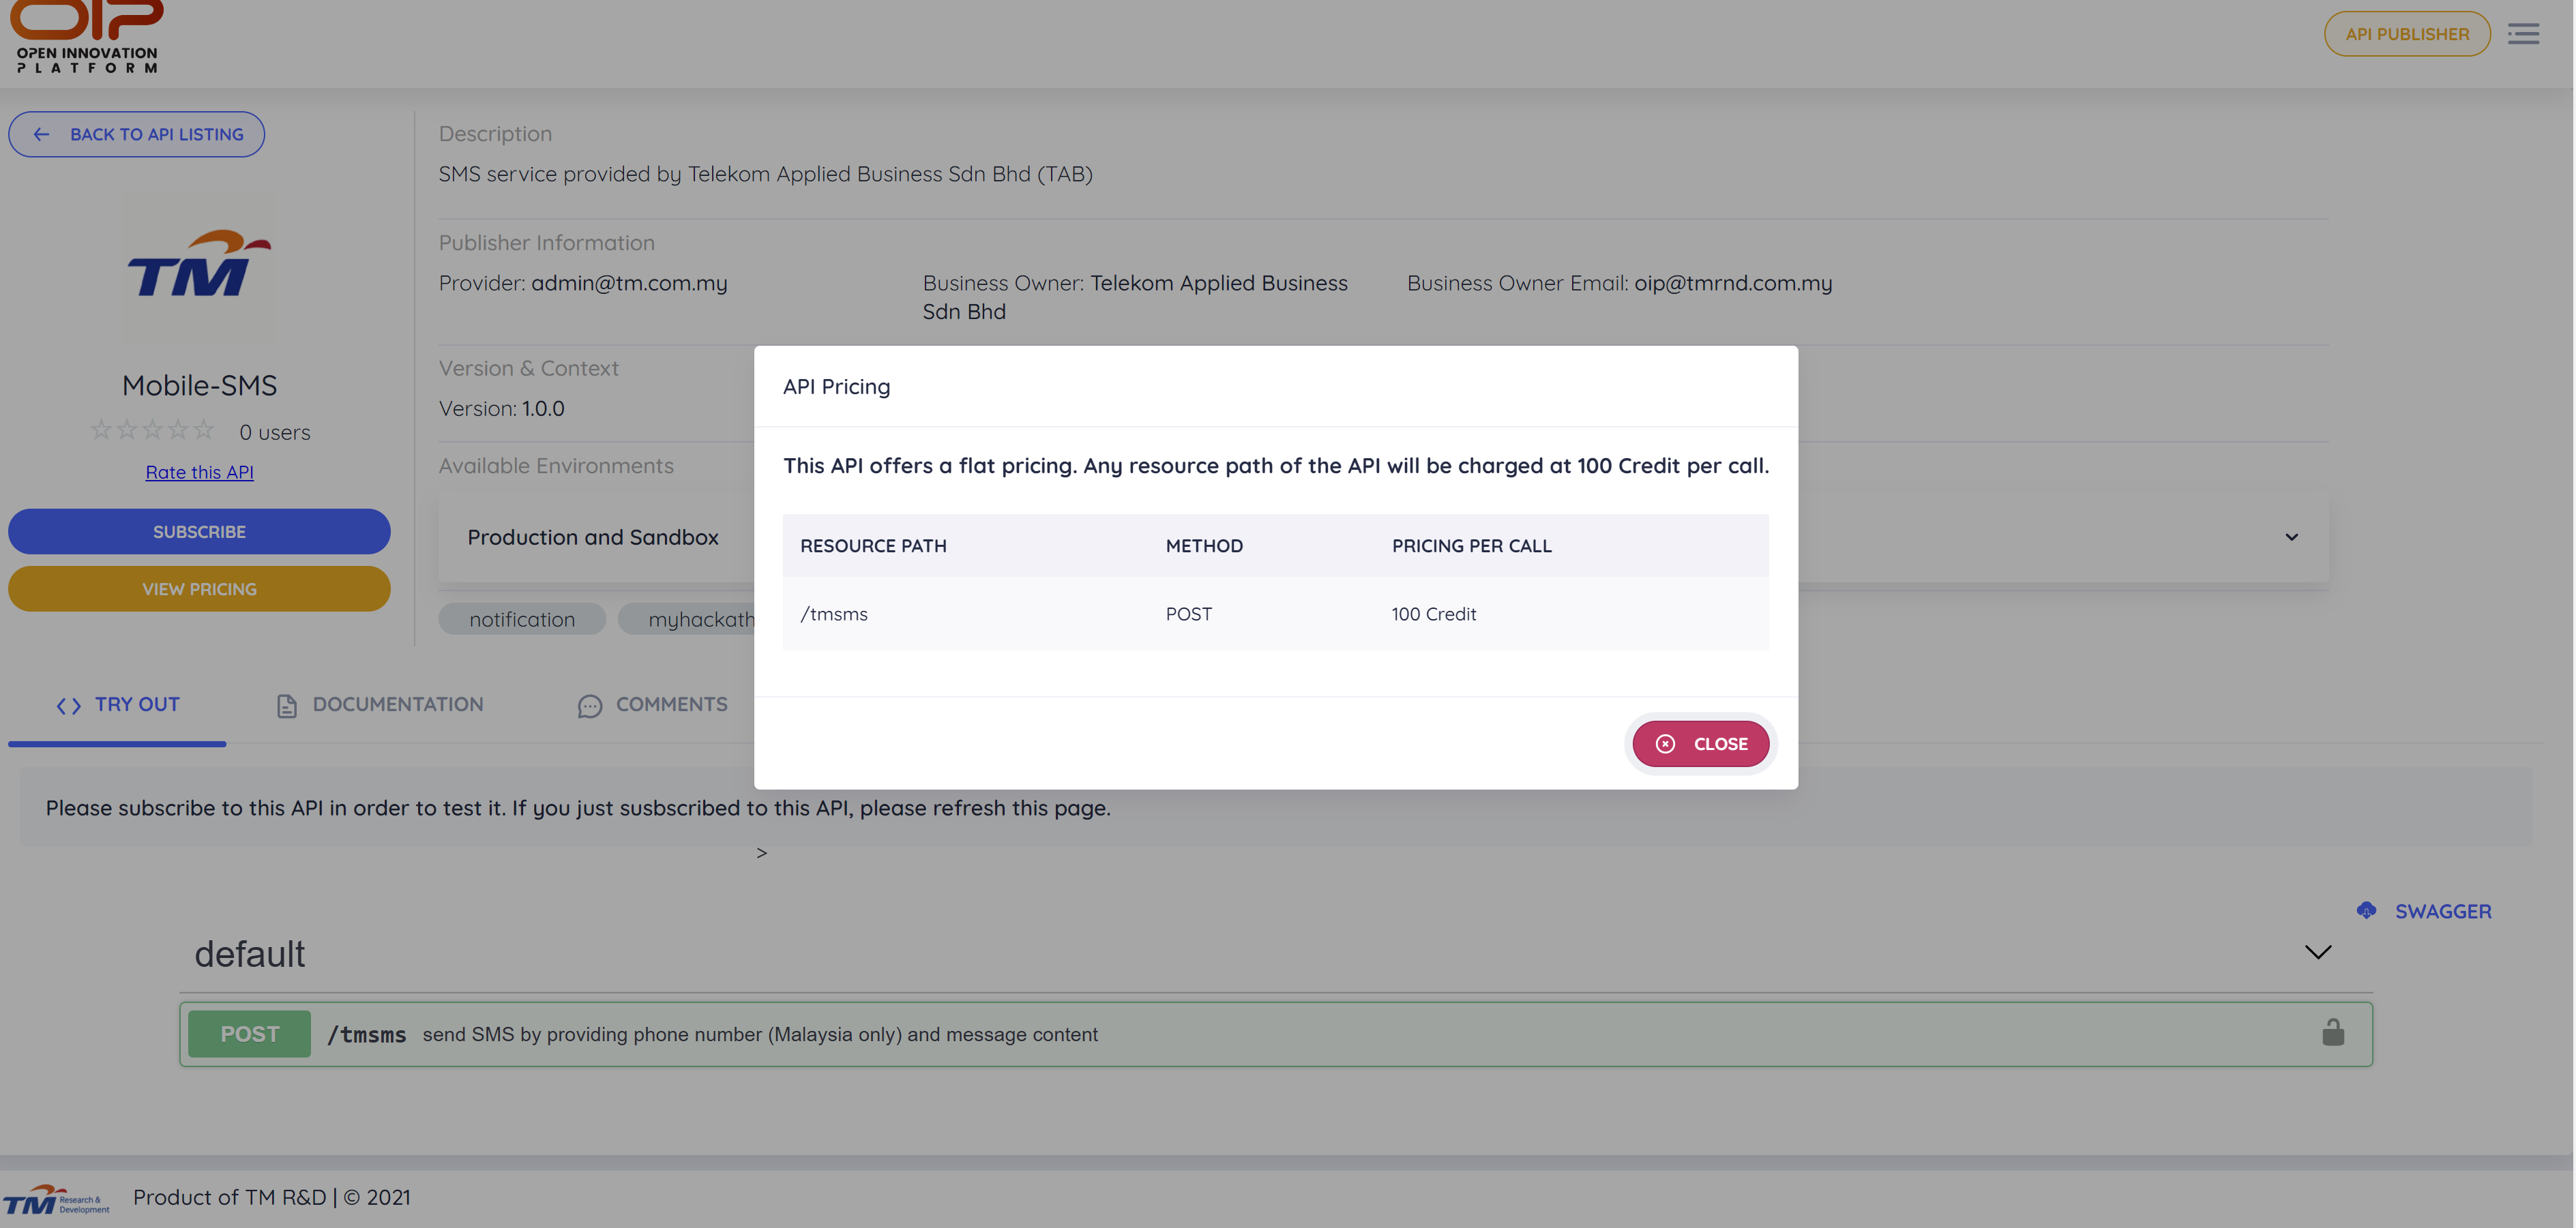
Let us demonstrate on how to subscribe to Mobile-SMS API in Notification Hub. The way to use other Paid API will be similar as described here.
Search for Mobile-SMS API and view detail. Click on View Pricing button to see the API pricing list.
Click on Subscribe button to subscribe to the API, similar to subscribing to a Free API.
Subscriber should have minimum credit of 100 to proceed with subscription of Paid API.
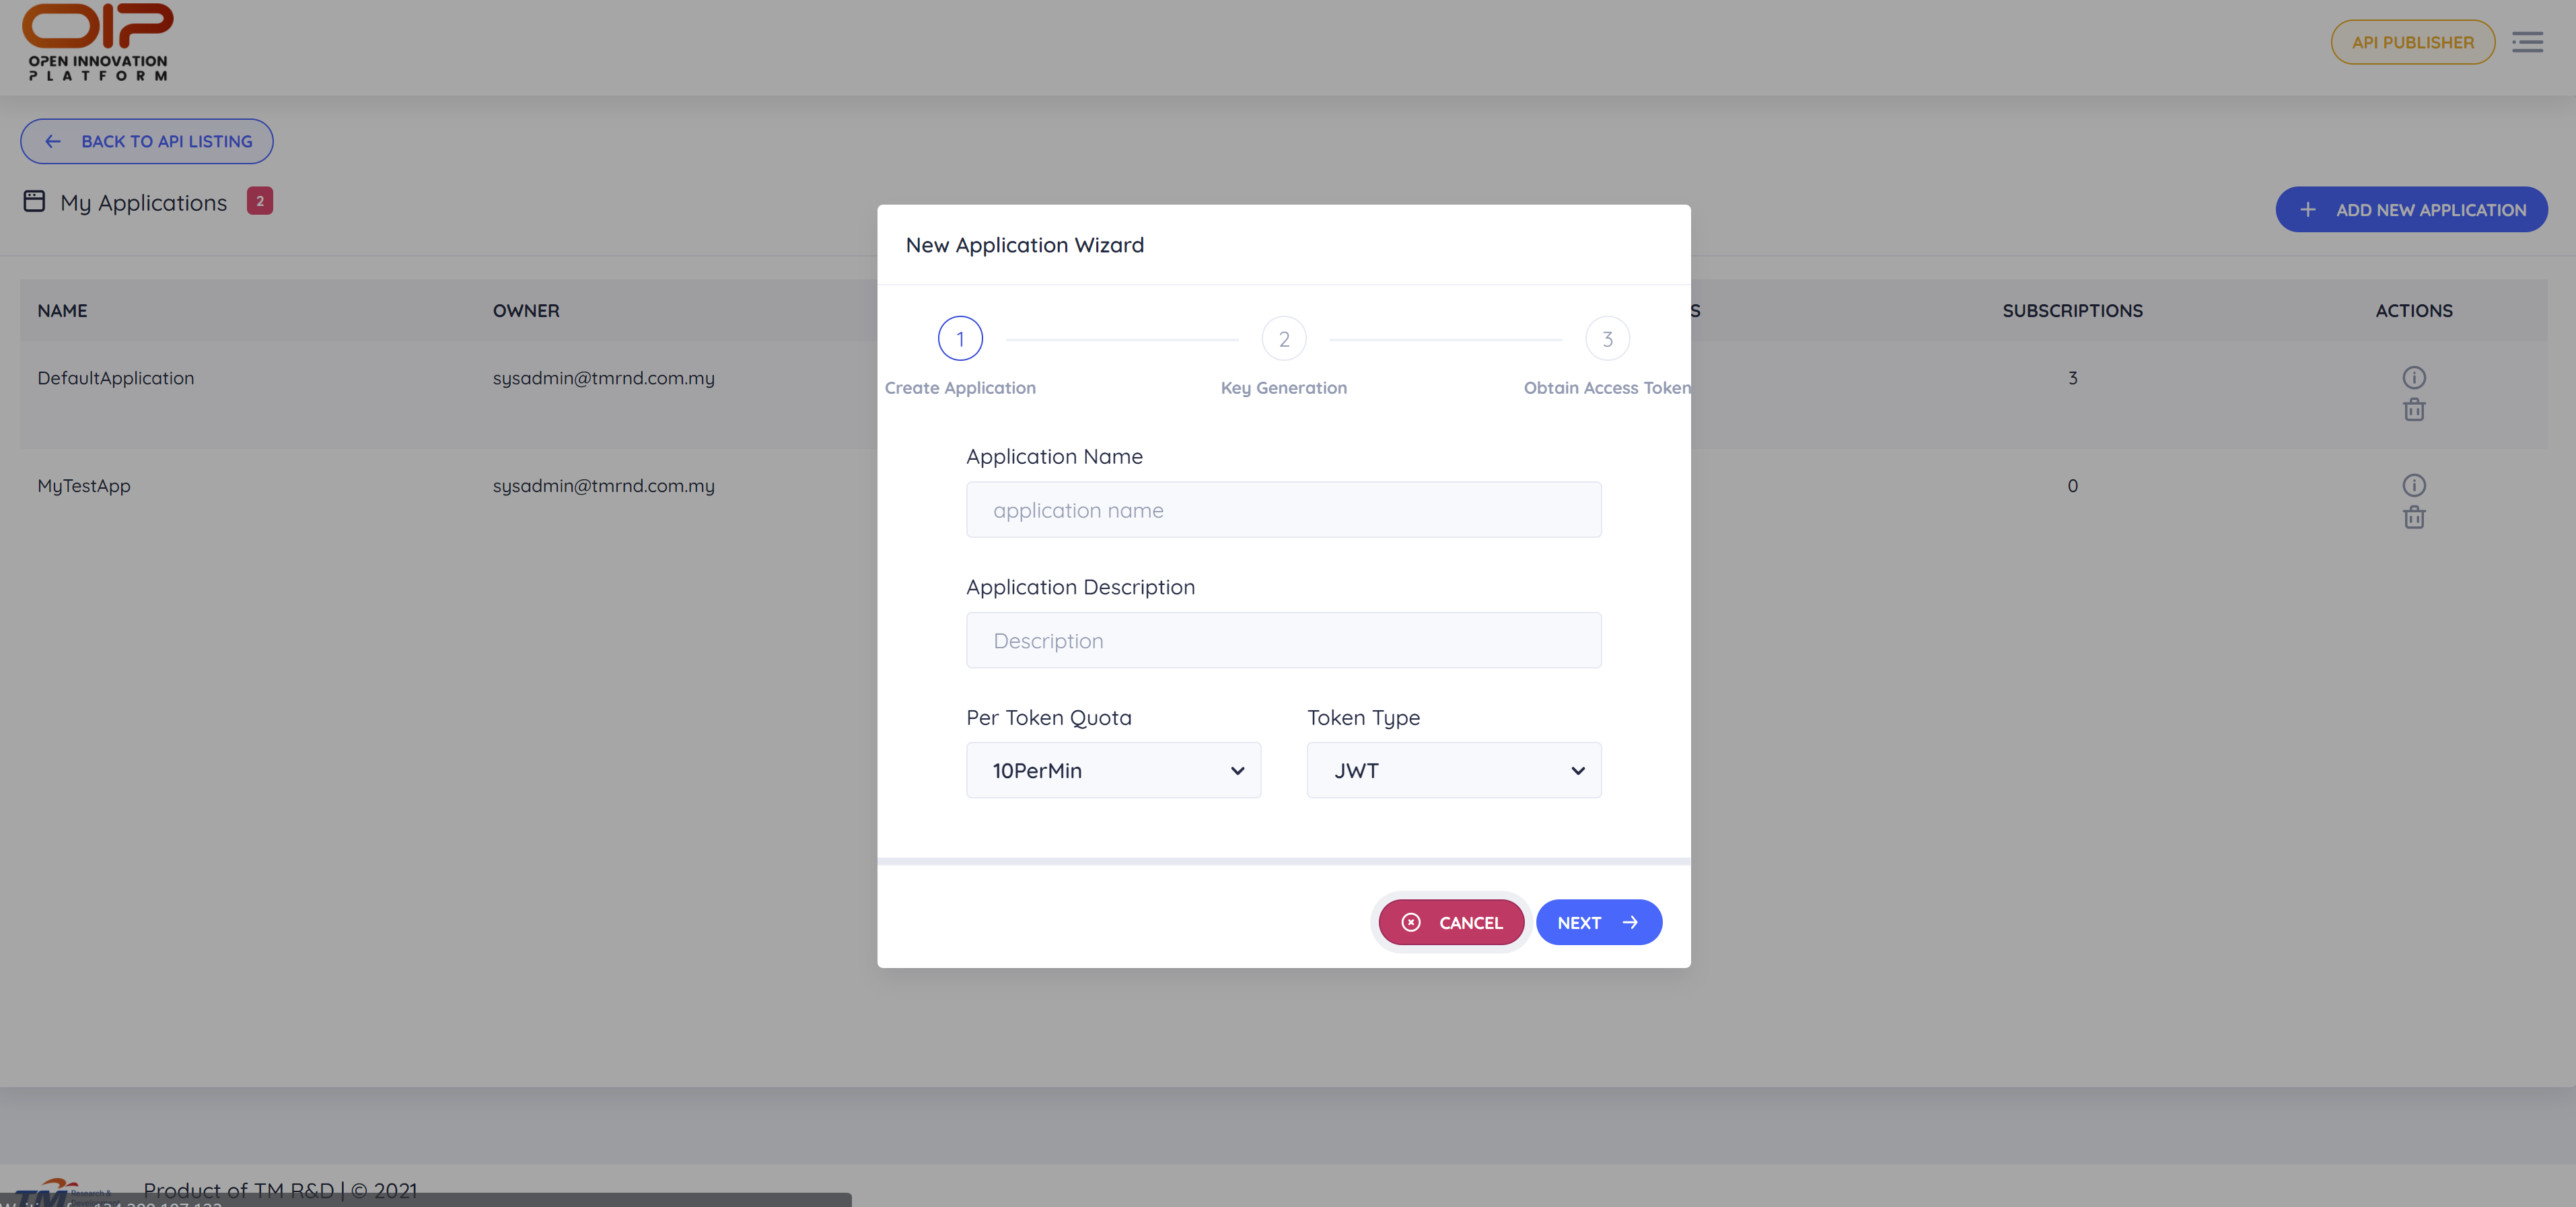
# Creating a new Application
Every API subscription is tied under an application. By default, every user has been given an Application called DefaultApplication. However, you can create a new application that fit to your needs. To create a new Application, click on menu bar at the top right of the page and select My Application.
Click on Add New Application. New Application Wizard dialog will appear. Enter the application detail, generate the key and obtain the access token.
# Using the Subscribed API
# Obtaining or Regenerating Access Token
To secure the API, access token is required for every API call. Thus, you need to generate the access token in case it is not yet generated before starting using the API.
Go to My Application and select the desired application to view its detail. Under the Production Credential, click Generate Access Token.
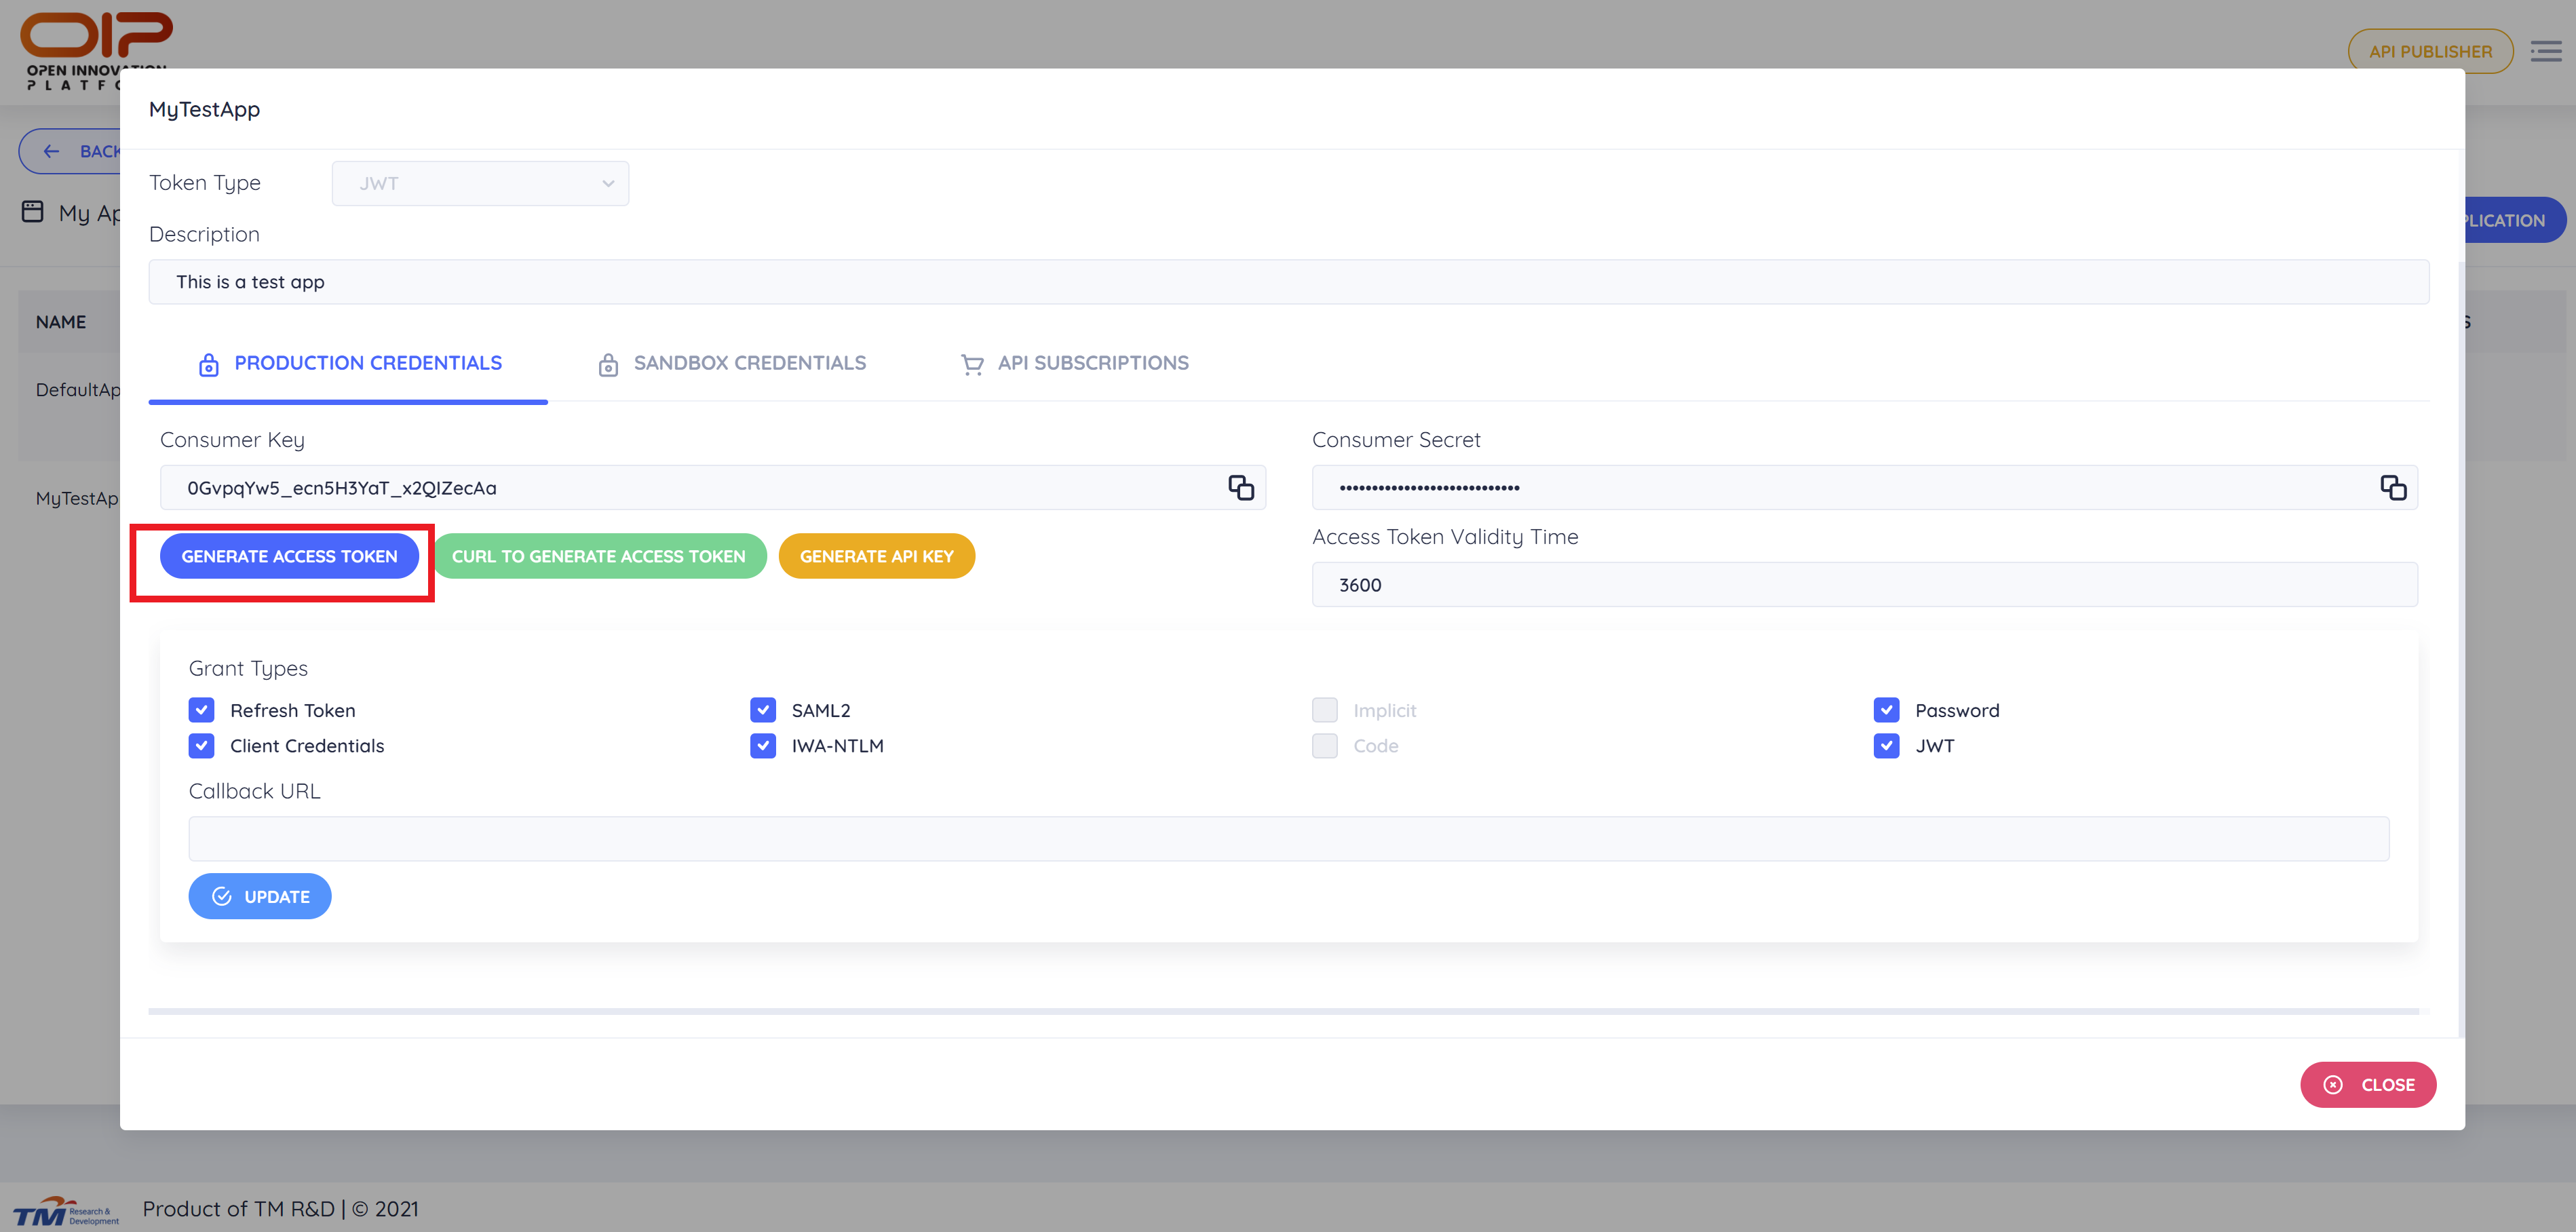
By default, the validity period of the access token is 3600 seconds. You can set it to -1 if you want it to never expires. Then click Generate.

Once the key is generated, copy the token and save it somewhere safe. The token will not get displayed anymore once the window closed. You can always regenerate the access token by clicking on Generate button again. You may repeat these steps for Sandbox Credential.

# Regenerating Access Token on New API Subscription
For any new subscribed APIs, JWT need to be regenerated for the new subscribed APIs, else you will encounter the Resource Forbidden error in your API call. Your previous subscribed API using the previous generated JWT can be reused and any modification is not needed.
# Calling API from Integrated API Console
Before integrating the subscribed API into your actual application, you may test API call through our Integrated API Console. From that, you can anticipate the result's structure of the API and adapt it with your own application.
Search for the API you have subscribed to and view detail. You can see the API Console at the bottom section of the detail. Key in the Access Token that you have obtained from previous section into the Access Token field just right after the Bearer field.
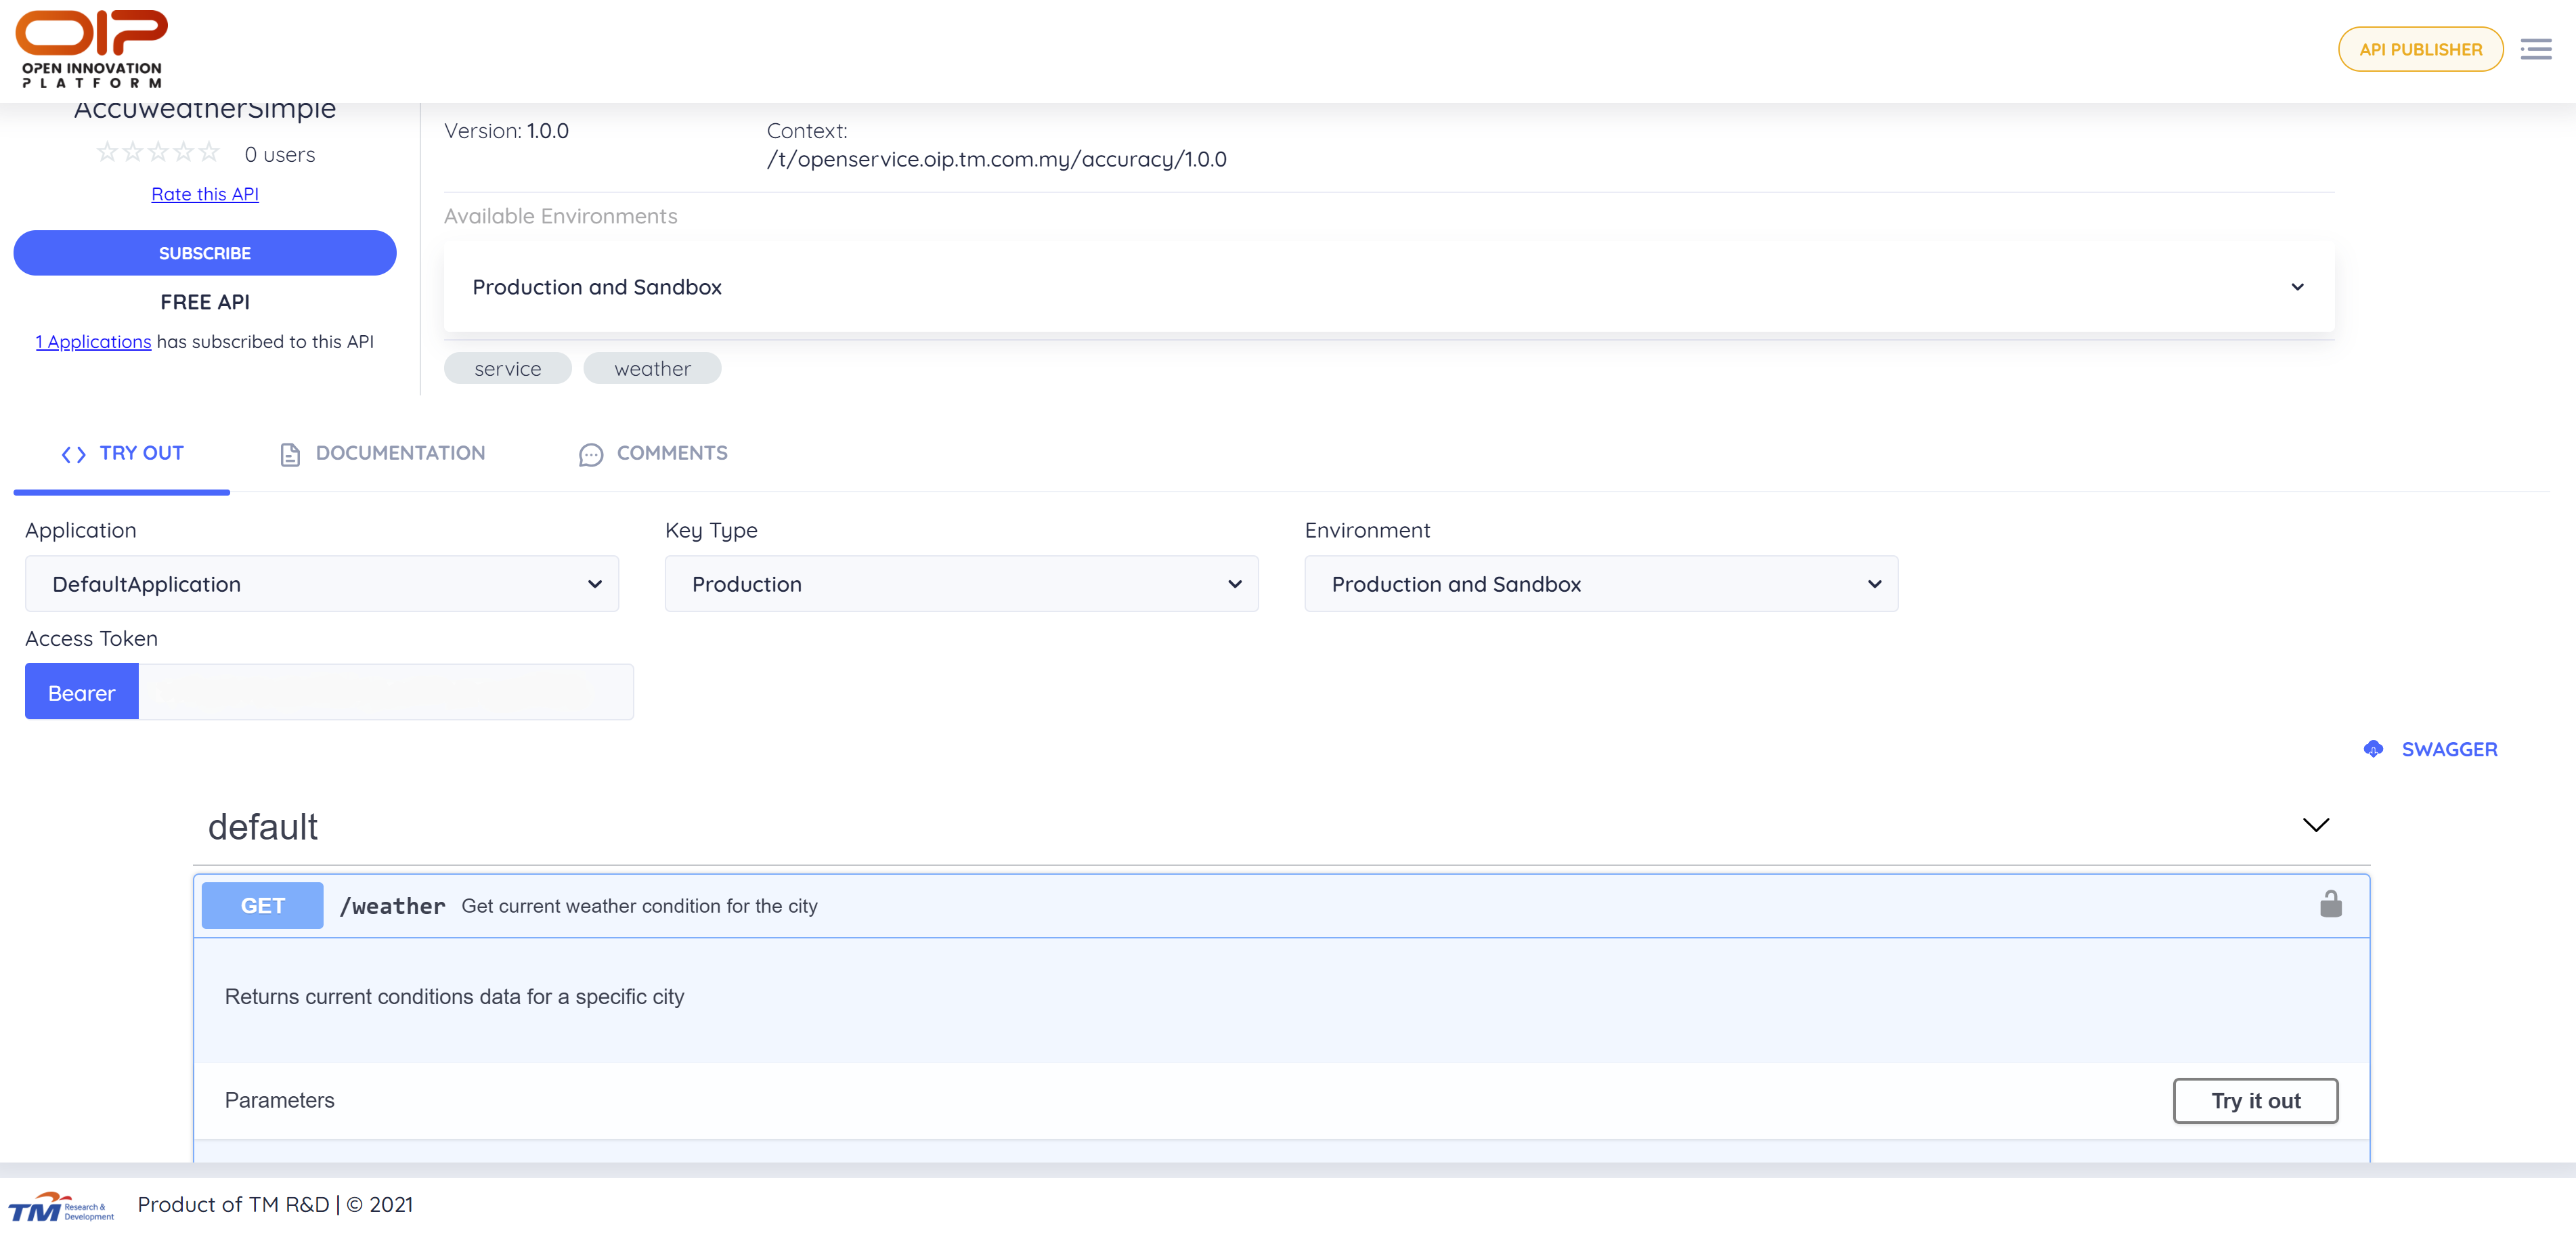
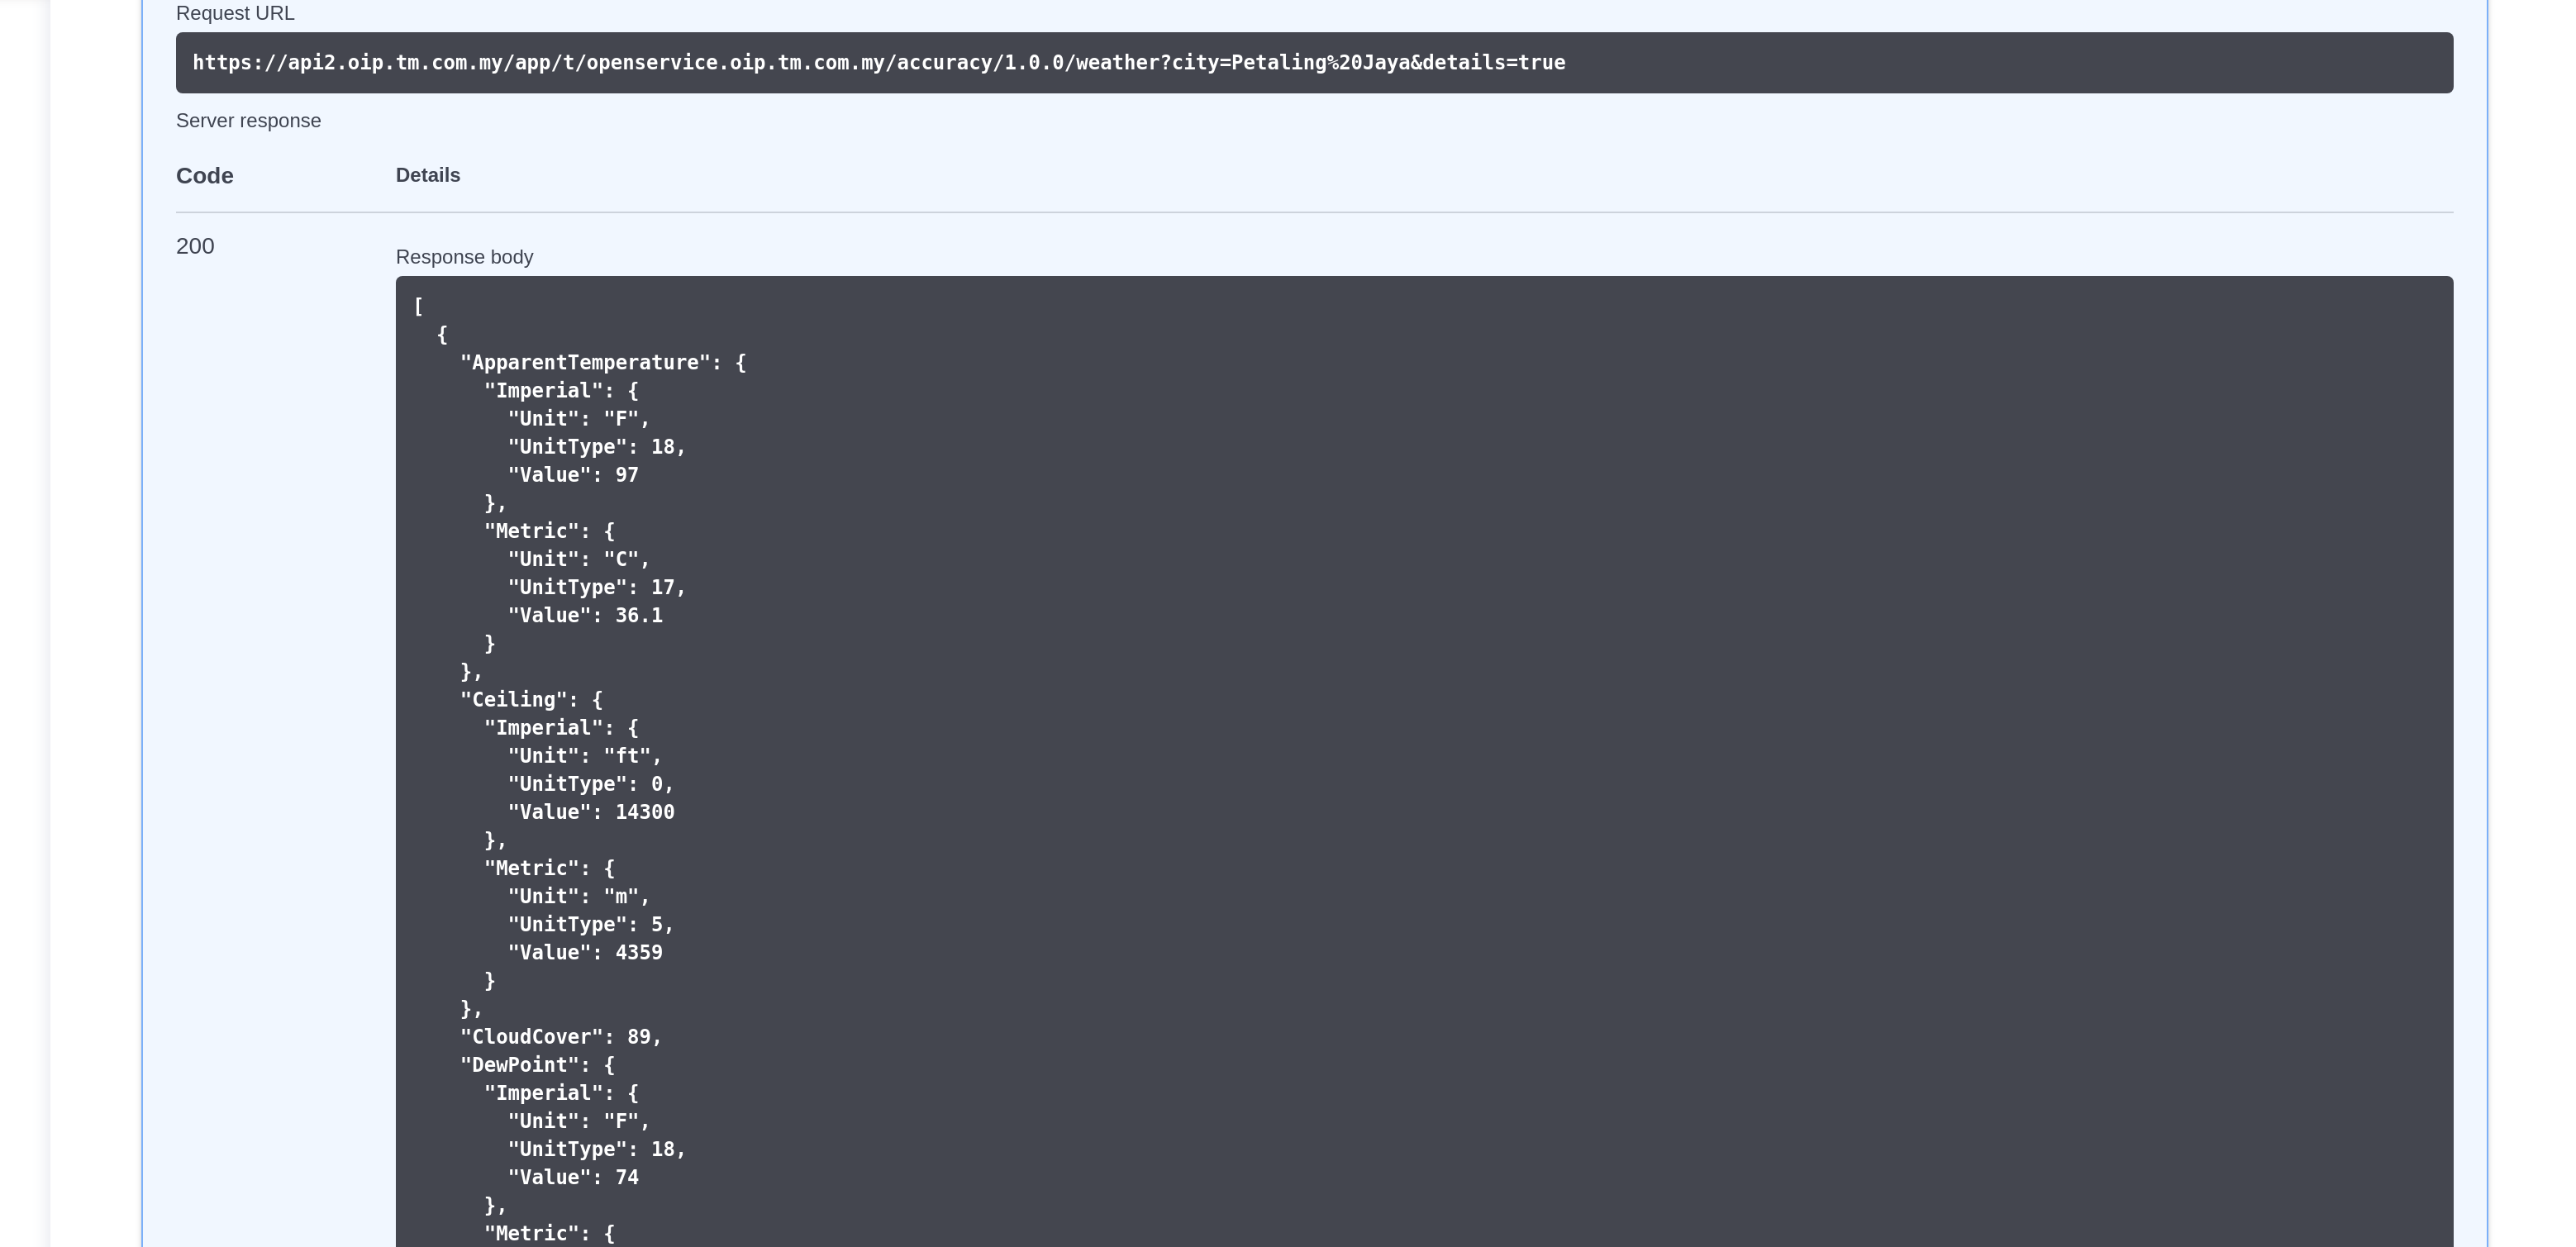
Select a resource path that you would like to test out and click on Try it out to try the API. Insert the required parameters and click Execute. The result will be displayed.
For Paid API, subscriber should have minimum credit of 20 to be able to make API call.The subscription will be on hold once the credit reaches 20 .Subscriber need to reload the API to continue using the API.
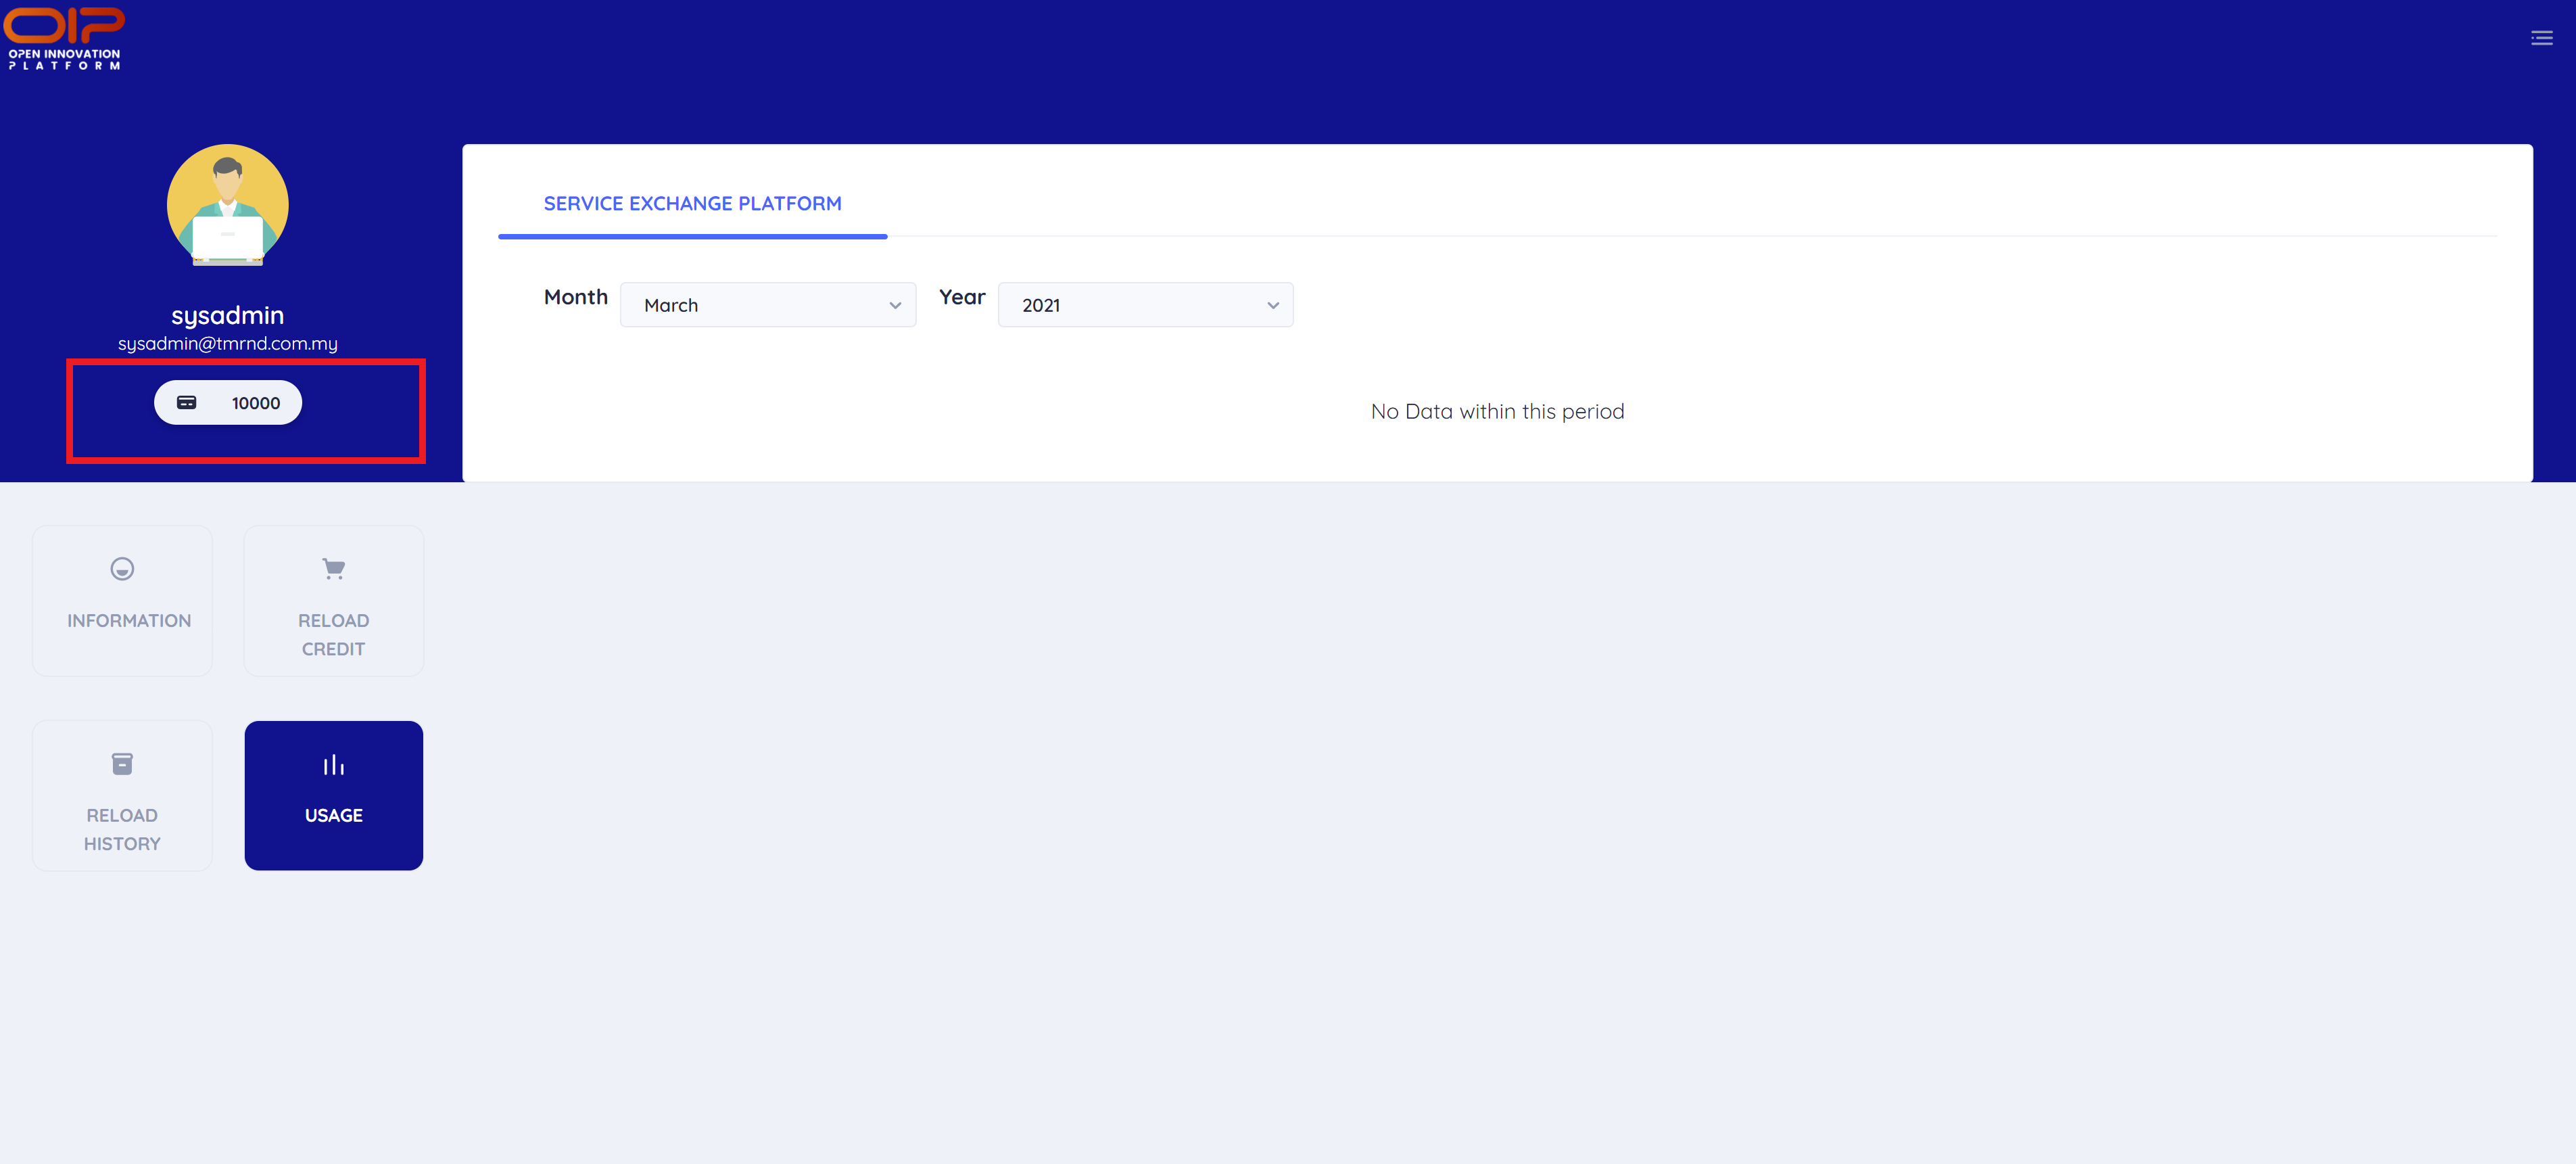
# Billing
Every user is given a billing account regardless if they are subscribing to a Paid API or not. From the Billing Portal, you should be able to see your credit usage againts the Paid API you are subscribed to.
# Accessing Billing Portal
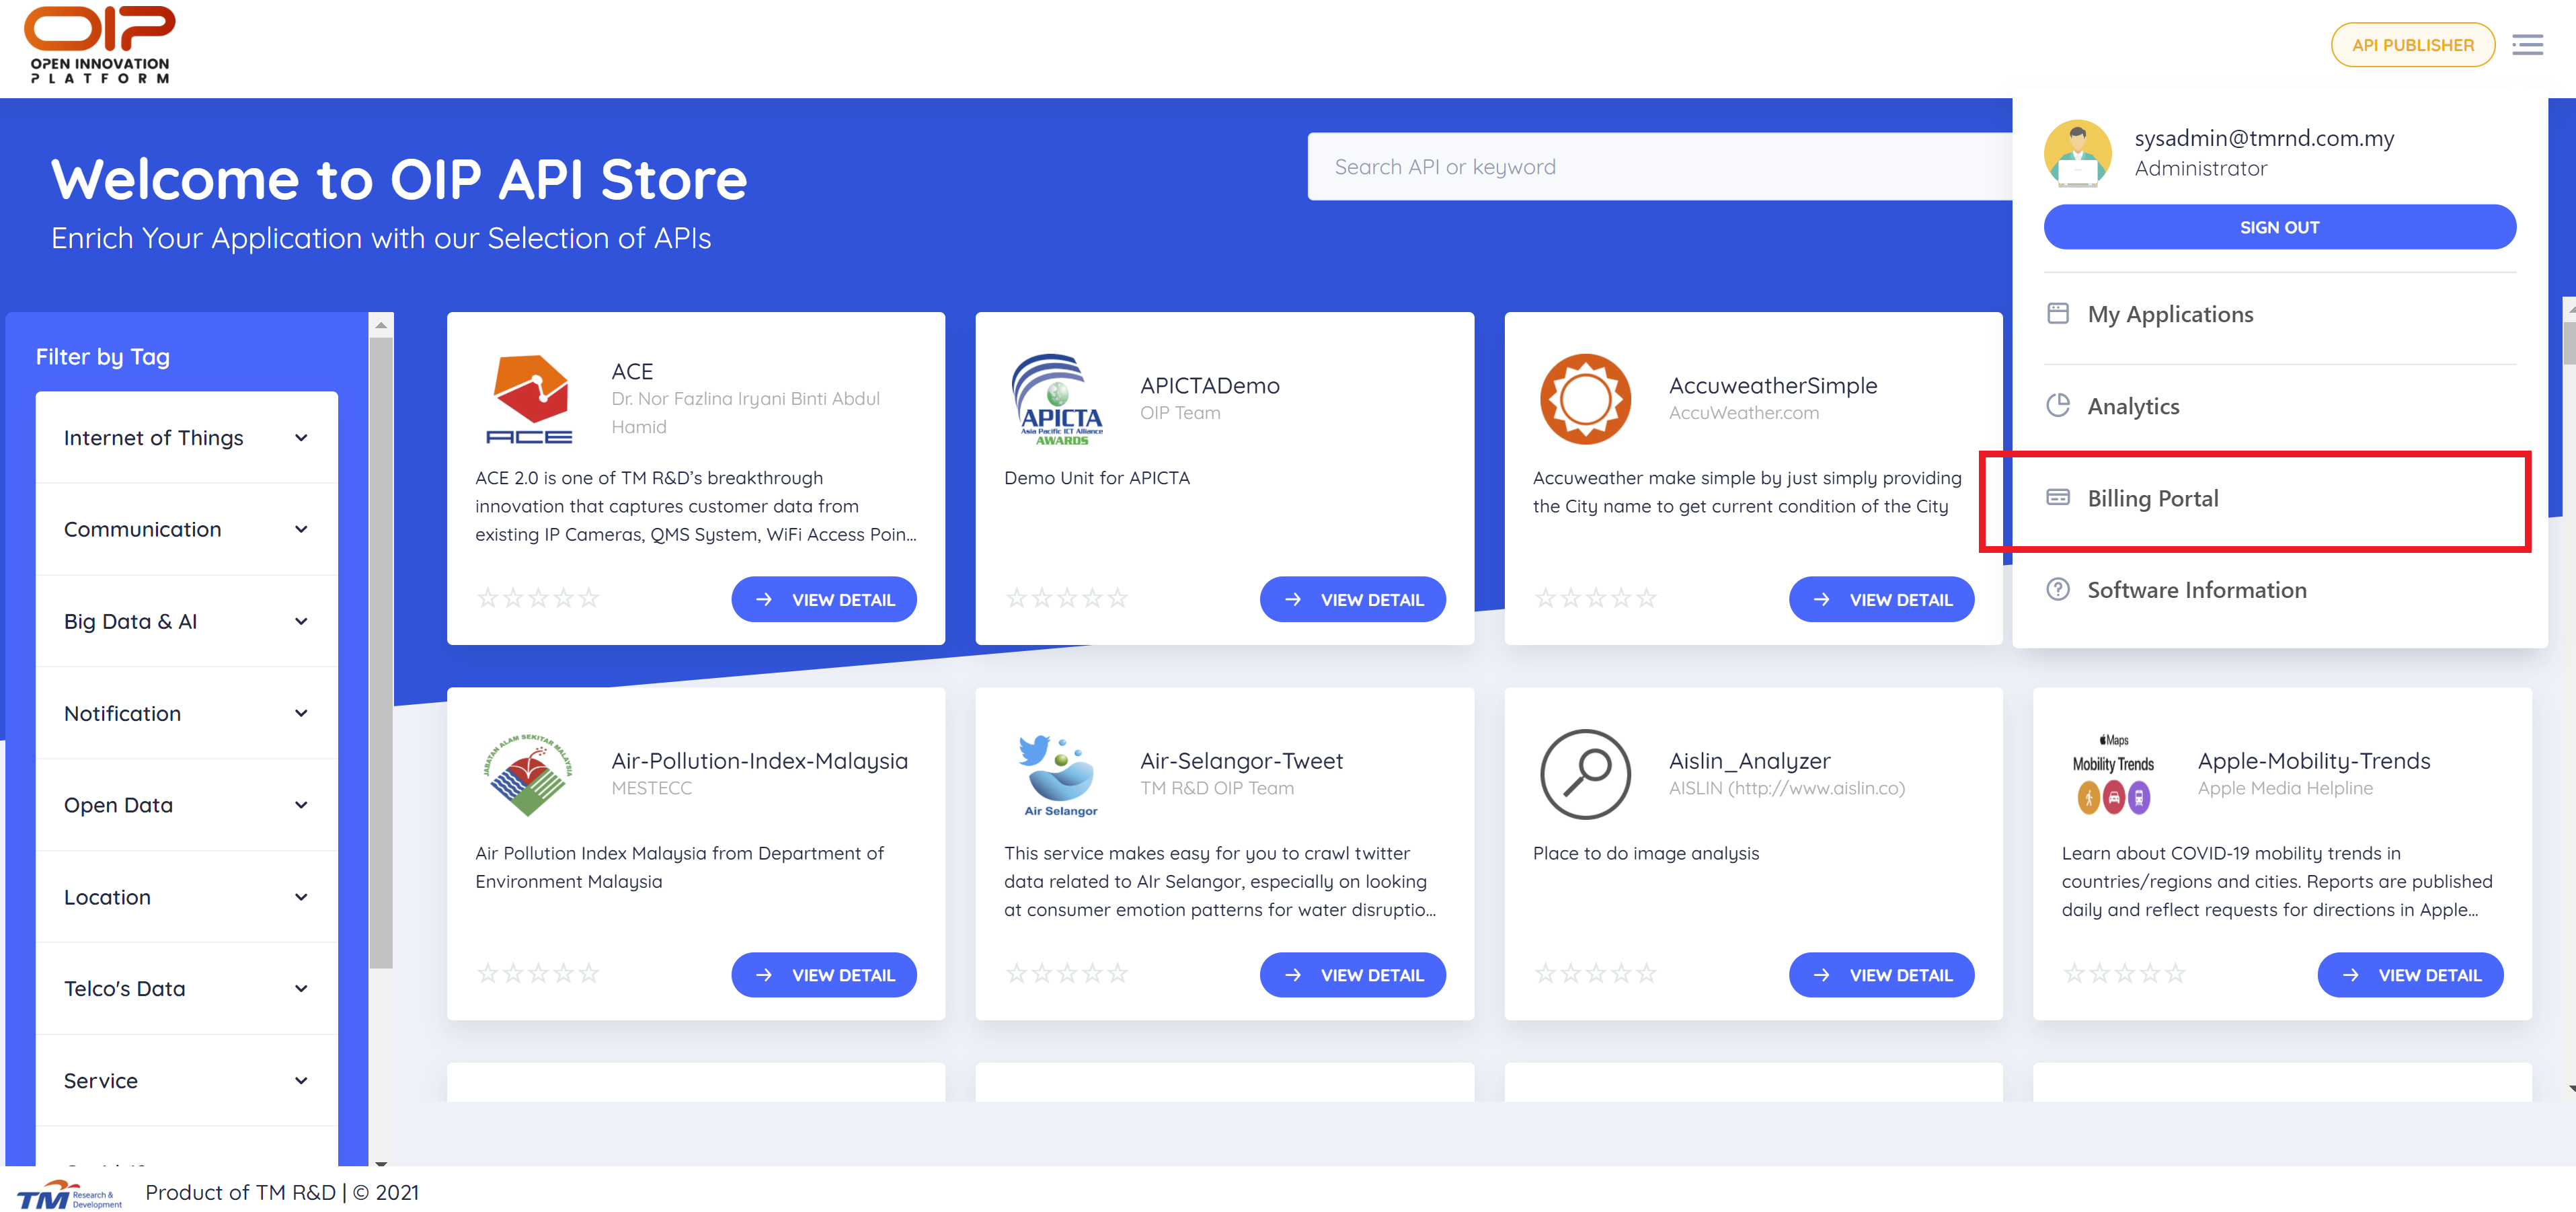
To access the Billing Portal, simply go to menu bar at the top right section and select Billing Portal. You will be redirected to the Billing Portal UI. You may need to sign in again.
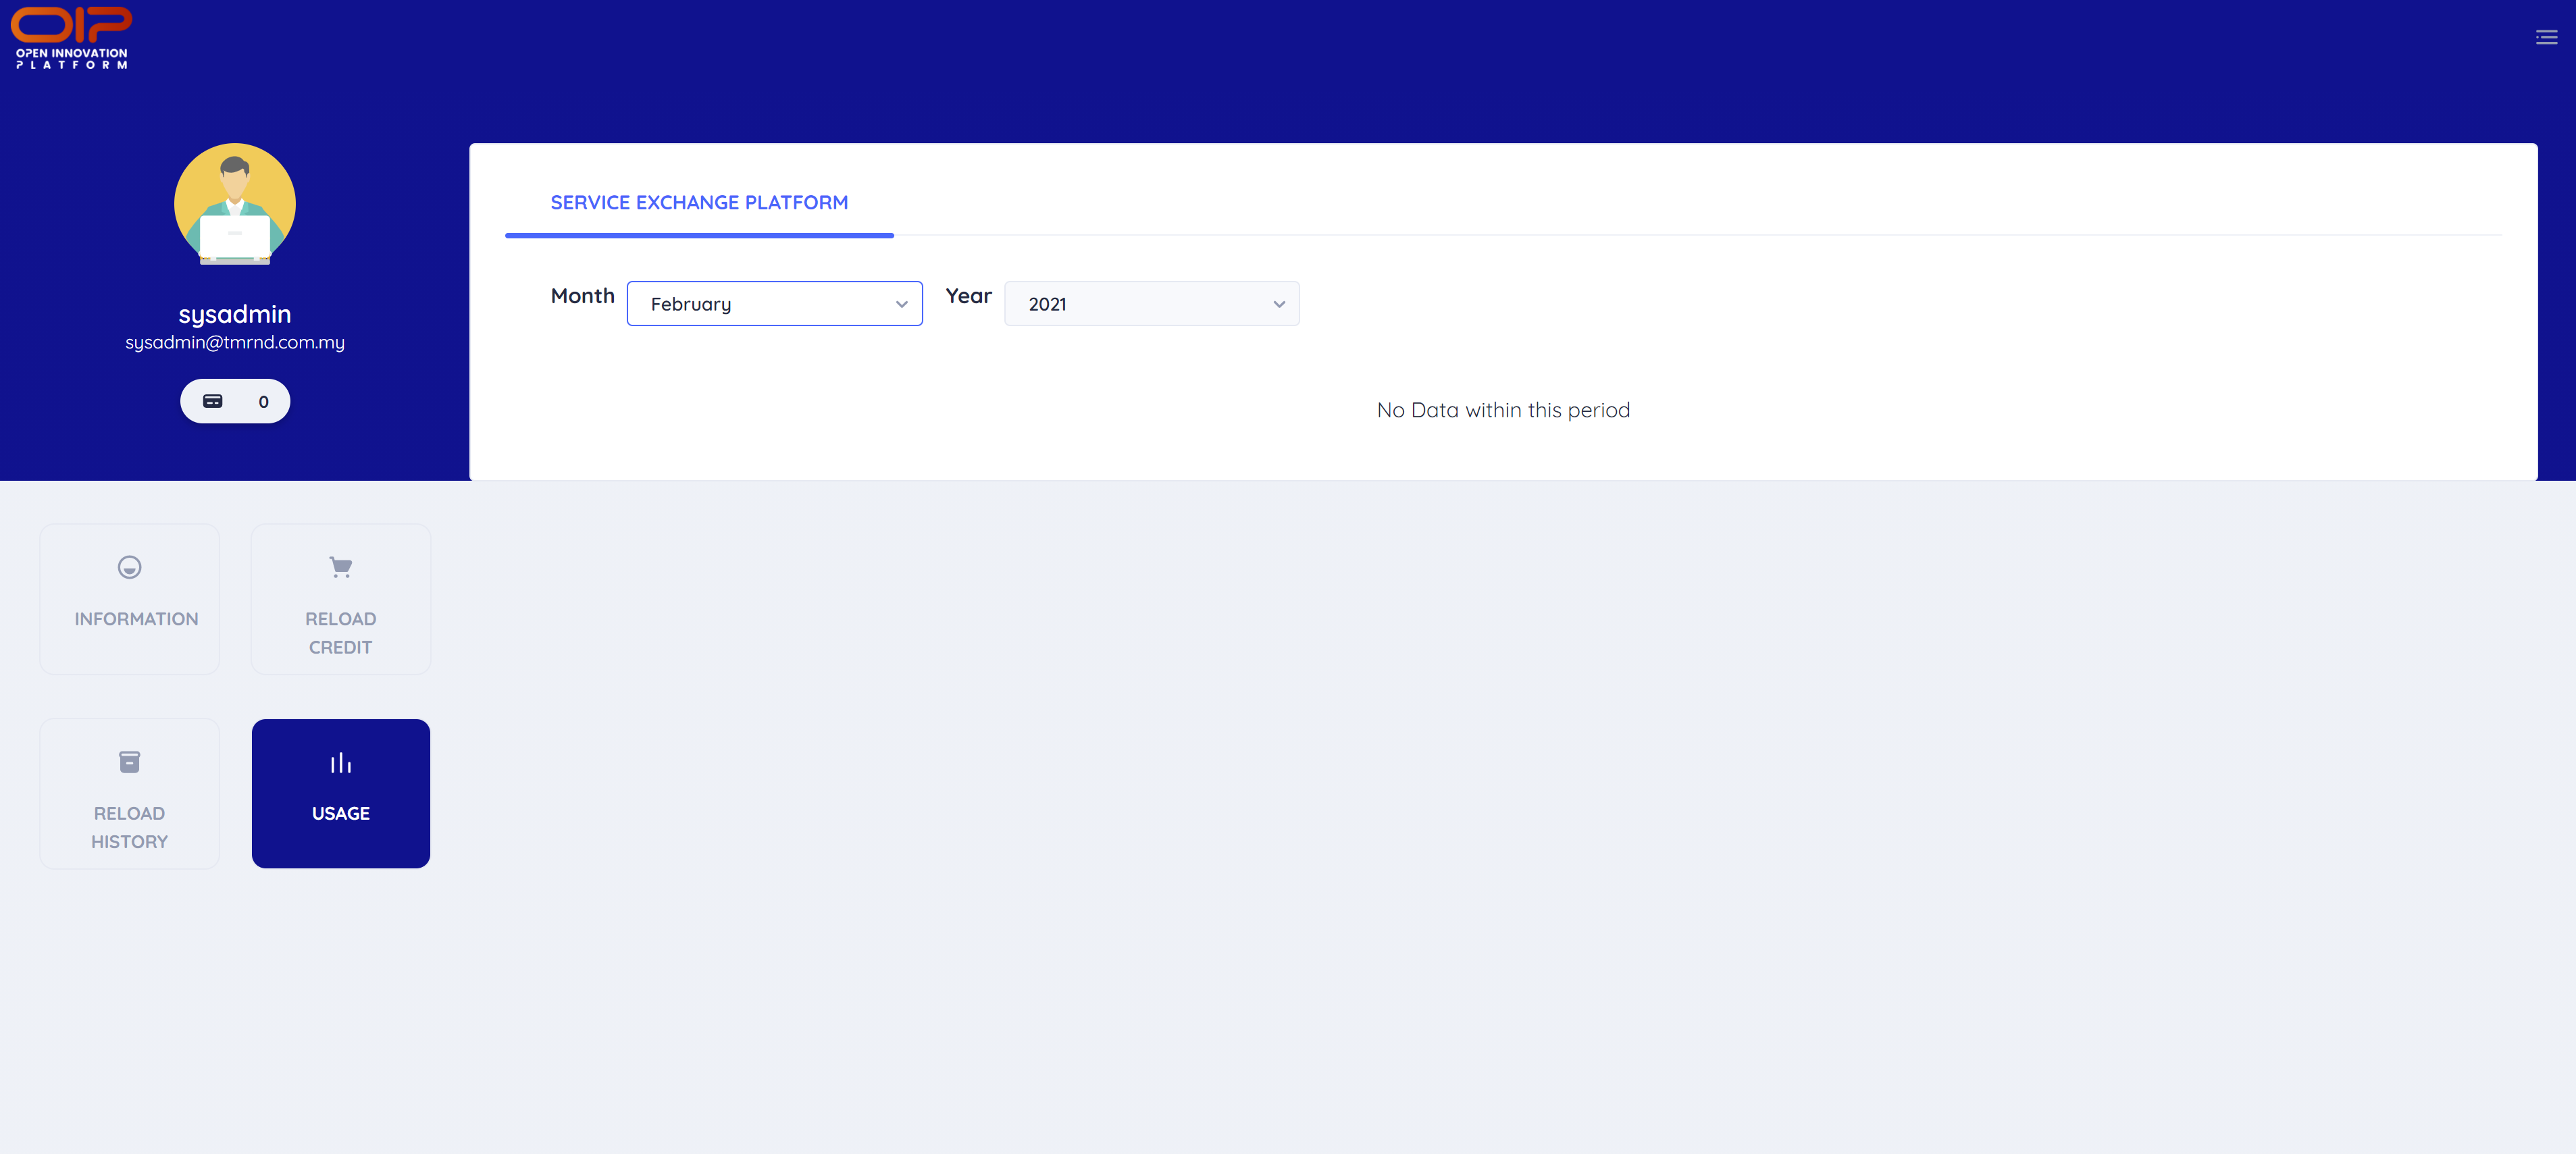
From the Billing Portal, you can see the usage of your subscribed APIs, doing credit reload and view your reload history.
# Credit Reload
In order to subscribe to a Paid API, you need to have some credits in your billing profile. Thus, you need to do a Credit Reload. To do a Credit Reload, simply click on Reload Credit.
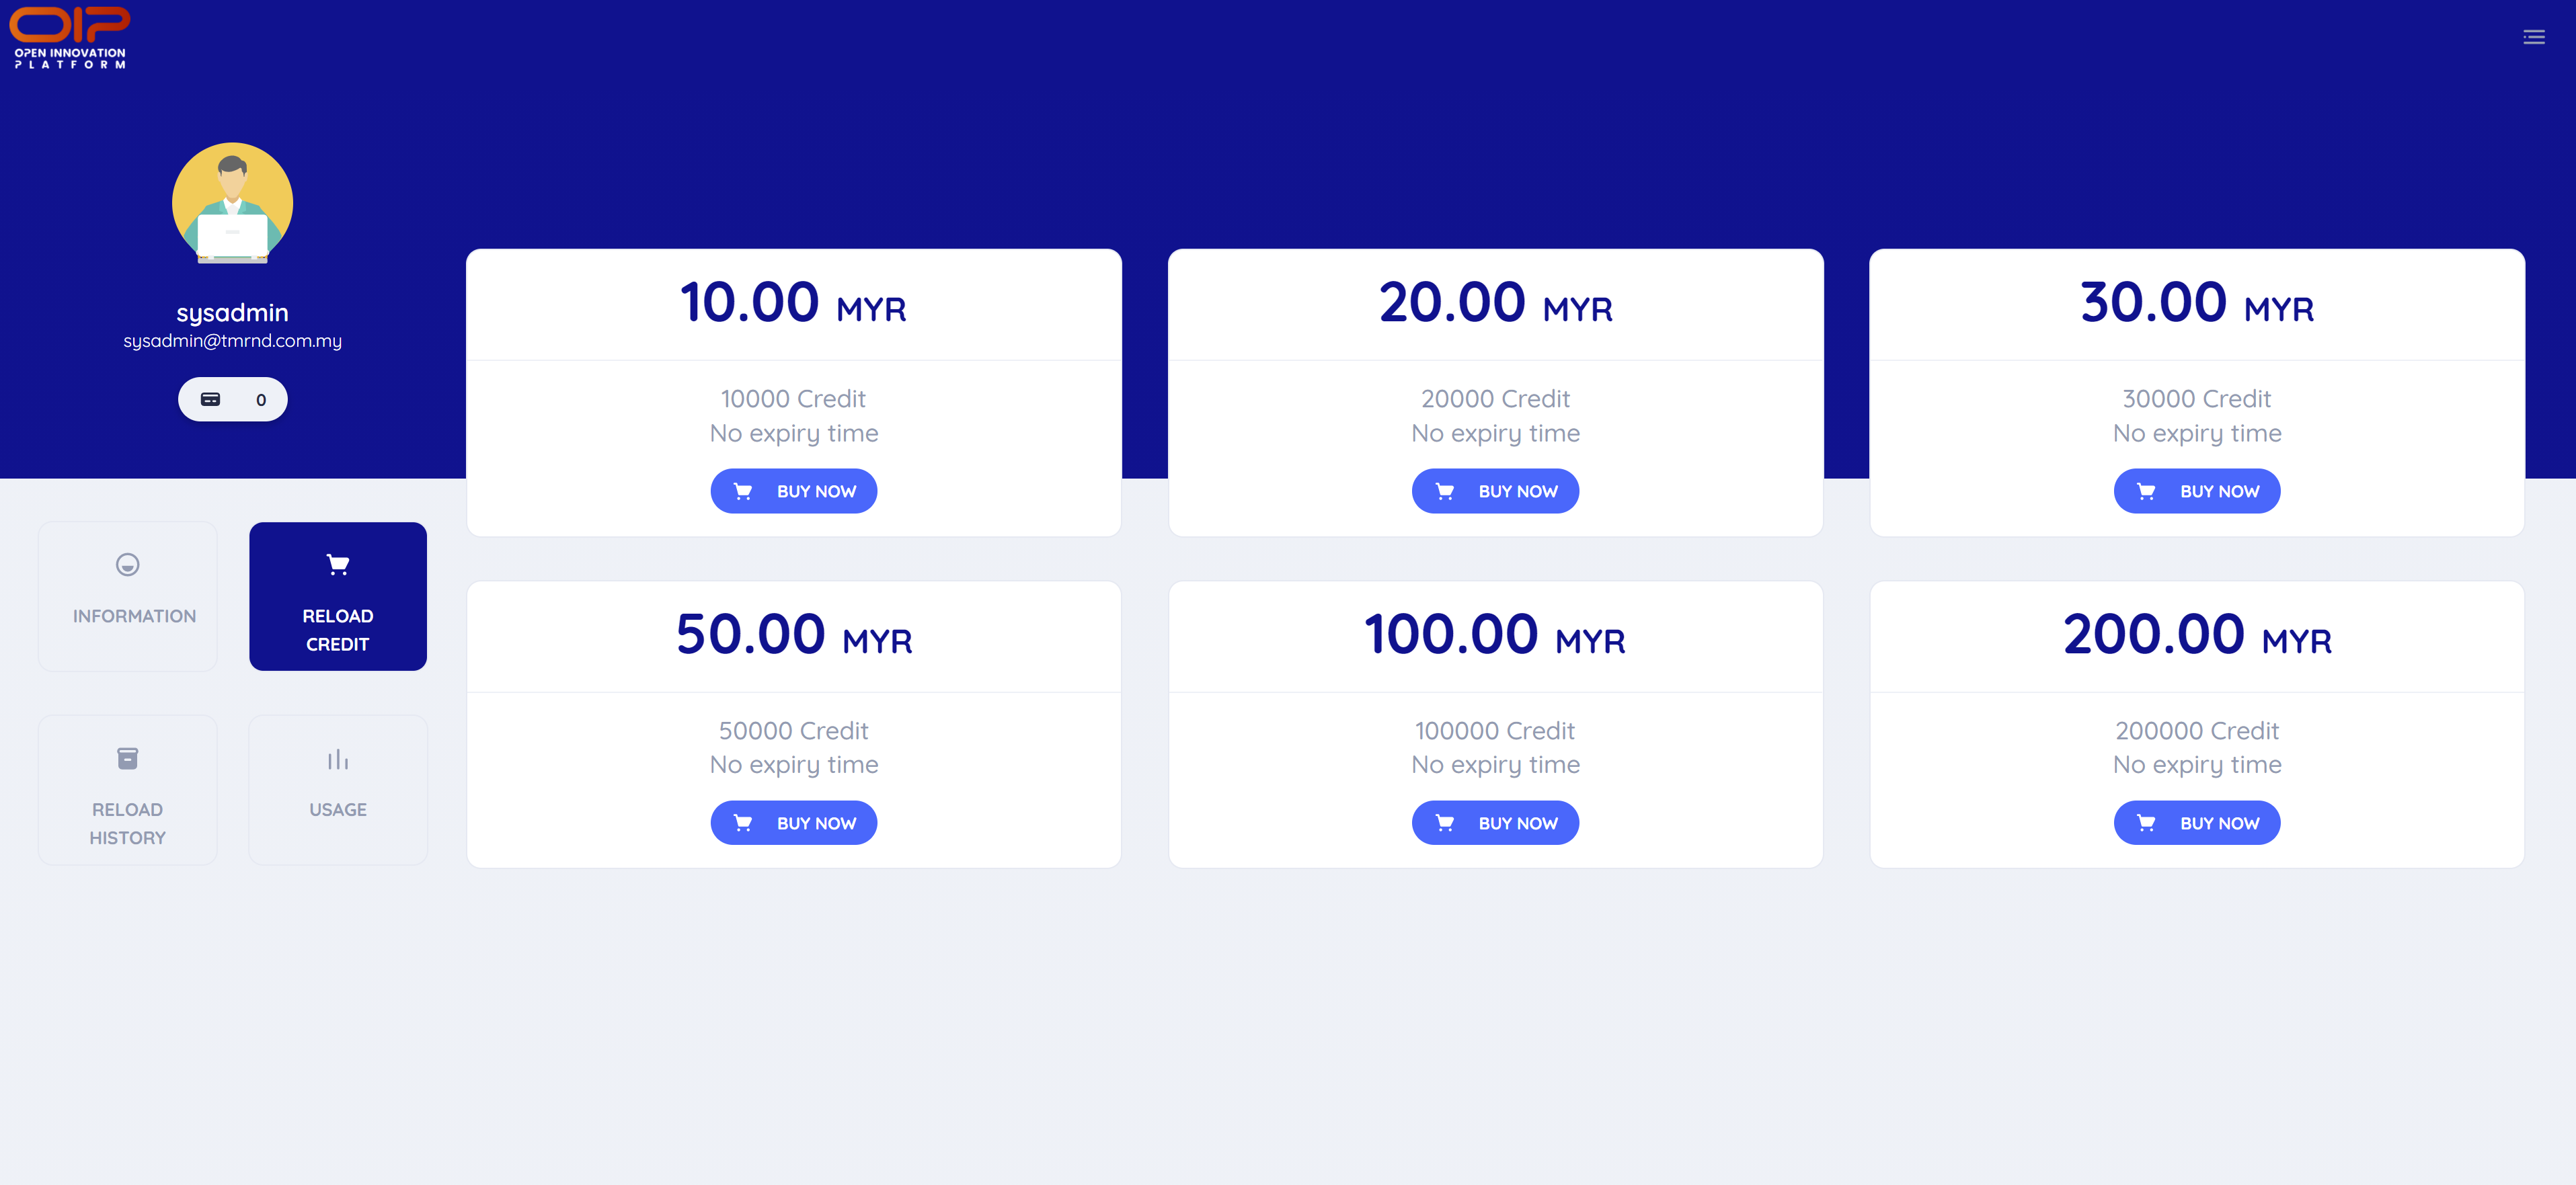
After that, you can see a selection of amounts that you can choose. Select any desired amount and you will get redirected to our secured payment gateway. Once transaction completed, your new credit amount will reflect on the Billing Portal.